Adding a Project
After your Elasticsearch index mapping has been created and supplied, a project must be created in Arranger. The project will reference the mapping and allow an administrator to configure the search filters, result columns, and so on that need to be exposed to the front-end data portal.
There are several parts to this:
- Configuring Arranger metadata files in advance (prerequisite)
- Adding the project to the Arranger Admin UI
- Configuring the project once it is created
NOTE: Although multiple projects can be created and exist in the Arranger Admin UI, currently only ONE project can be actively in use by the front-end data portal at a time. Your UI application must specify in its interactions with Arranger (e.g. queries) which project to use.
Setup Arranger Metadata Files
When creating a new project, several JSON files need to be imported. They describe the metadata configurations for your project. These files need to be created in advance to reflect the fields in your index mapping that need to be configured within Arranger.
For reference, we provide a set of sample JSON files for the default file_centric_1.0 index here as a guide.
The required JSON files are:
| File | Description |
|---|---|
| aggs-state.json | Configures the search filters and aggregations in the data portal's facet panel. |
| columns-state.json | Configures the data columns in the data portal's search results table. |
| extended.json | Extended (extra) configurations for your Elasticsearch index mapping. |
| matchbox-state.json | Configures the quick search settings for specified fields in the data portal. |
 Tip
Tip
For your own custom index mapping, you only need to replace the fields in the JSON files with the fields you wish to configure in Arranger. You do NOT need to supply the actual configuration values, since you can do that in the UI once they are imported. Just make sure the JSON files are in the correct format per the default example, but with the list of fields from your own mapping instead of the default ones.
Add Project to Admin UI
To add a new project to the Arranger Admin UI, do the following:
- Open your browser and go to the Arranger Admin UI hosted on
localhost:8080. The Admin UI is displayed with no projects listed:
- From the Project versions list, click Add Project:
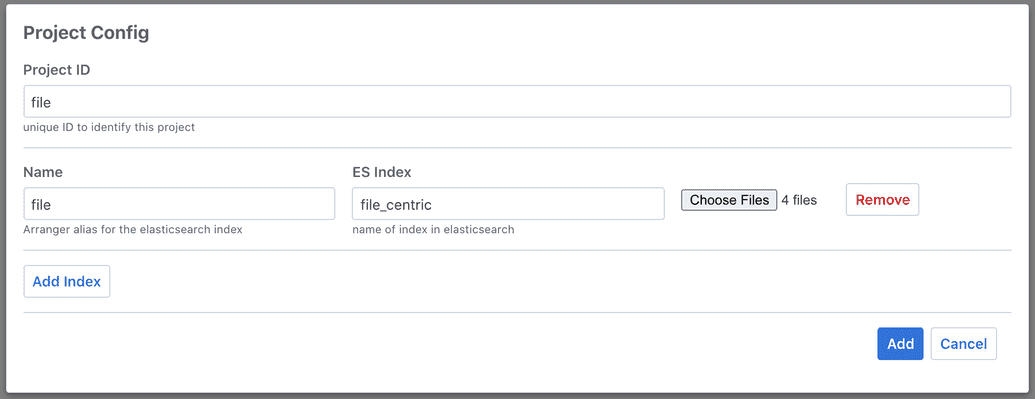
- A pop-up control appears. In the Project ID field, enter a Project ID. This must be in
snake_caseand dashes (-) are not allowed. If you are using the default sample index, you can simply enterfile.
- Under Project ID, click Add Index. Additional fields appear.
- In the Name field, enter a cosmetic name for the index. If you are using the default sample index, you can simply enter
file.
- In the ES Index field, enter the actual Elasticsearch Alias Name value that you specified in the
index_config.jsonfile. If you are using the default sample index, then enterfile_centric_1.0.
- Click Choose Files, then browse for and select the four (4) JSON metadata files that define your project's default configuration in Arranger. These are the same files you setup earlier above:
aggs-state.jsoncolumns-state.jsonextended.jsonmatchbox-state.json
- The configuration pop-up should now look like this:
- Click the Add button in the bottom right of the pop-up. Verify that your project is now created and has an entry (row) in the Project versions list:
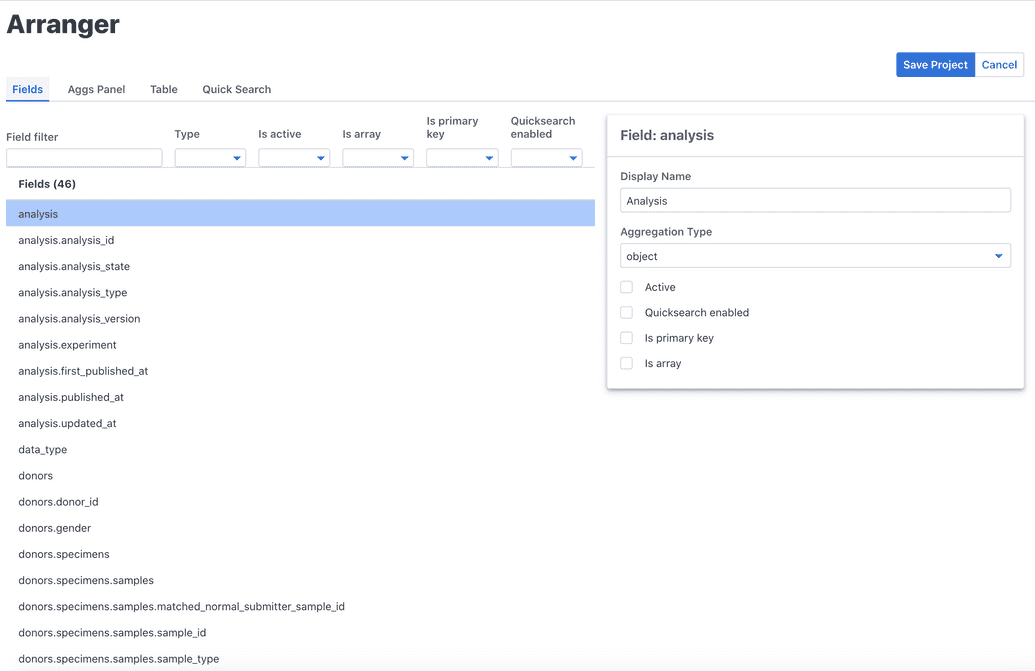
- You can click the Project ID to browse its configurations and make sure they match the metadata files you uploaded above:
Configure Project Metadata
For details on how to configure the project metadata, see the relevant sections in the User Guide:
- Configuring Extended Field Properties
- Configuring the Facet Panel
- Configuring the Results Table
- Configuring Quick Search
Indexing Data
Once Arranger is completely configured, you will need to index actual data into Elasticsearch so that it can be explored in your data portal.
If you are using Arranger with the full Overture product suite, you can learn how to upload and index data with our DMS platform bundle here.
However, if you are using Arranger and Elasticsearch standalone without other Overture components, you will need to index the data into ES yourself. See the Elastic documentation for guidance.


