Using the API
Ego provides an API based on the OpenAPI specification (formerly known as the Swagger specification) which allows users (manually) and applications (programmatically) to interact with Ego's core functionality. One major benefit of Swagger-based APIs is that they also provide easy-to-use, interactive API documentation via a web interface. Users can manually interact with the API by issuing cURL commands via their terminal. Administrators with access to the Swagger UI can also interact with the API via the web interface.
Although an administrative user will typically use the Ego Admin UI to perform operations, there may be scenarios where they wish to interact with the endpoints directly over a command line interface (by issuing cURL commands) or using the Swagger UI. In these scenarios, the user or application must first authenticate with the Ego API.
The sections below describe how to authenticate with and use the Ego API. We will walk through an example where an administrator wants to generate an API Key for non-admin user, so that the non-admin user can use that key for operations with other Overture applications. Specifically, we will generate an API Key for a specific user with WRITE permissions to the Overture Song and Score applications.
Retrieving Your Ego JWT
To make requests to via the Ego API, we must first retrieve our Ego Admin JWT. The JWT must have administrative privileges and will be used to authorize with the API before the endpoints can be used.
To retrieve your Ego Admin JWT:
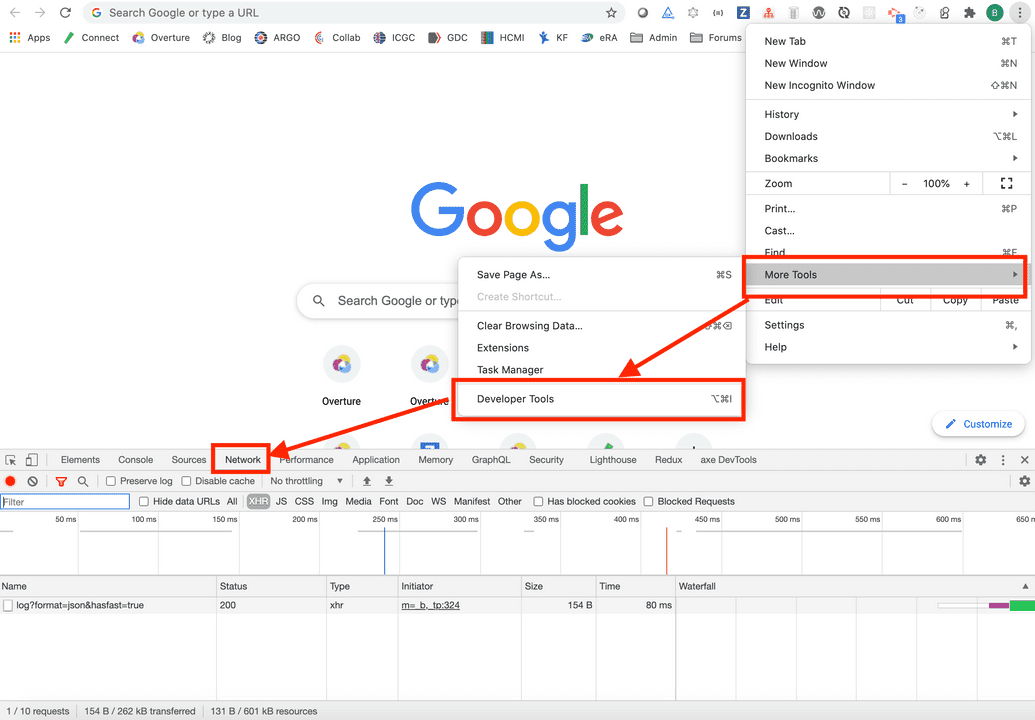
- Open your browser and open your developer tools and click on the Network tab. Leave this open because we must extract our JWT after logging into the Ego Admin UI. The method to access this tab may vary depending on the browser you are use. Please refer to your browser's official documentation for instructions if required. For example in Google Chrome, open the menu from the top right (click the three vertical dots
...), click More Tools > Developer Tools, then click the Network tab:
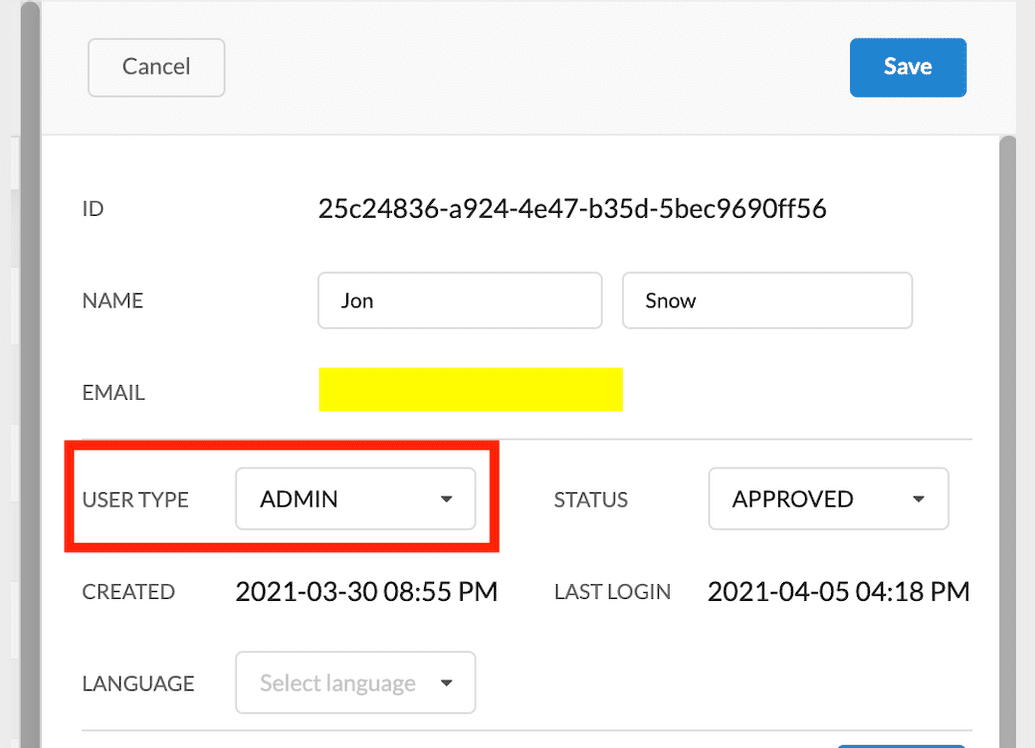
- Log into the Ego Admin UI. Click Users from the lefthand menu, then select your user profile. Your profile is displayed:
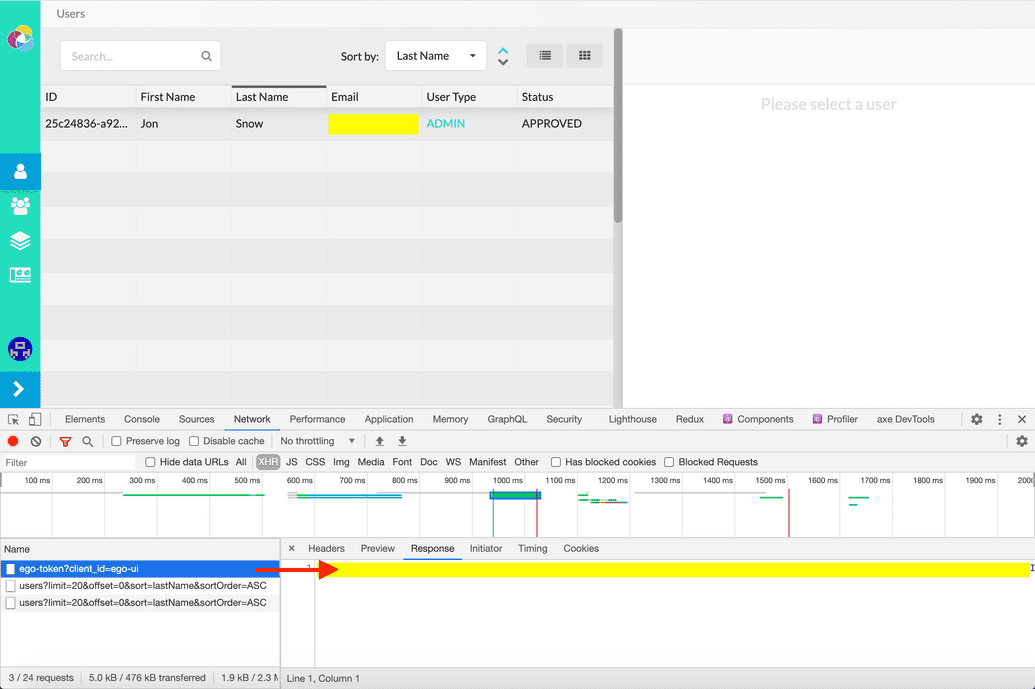
- Next look at the Network tab in your browser developer tools. In the request list on the left, search for a request suffixed with
ego-token?client_id=ego-ui. Click it, then click the Response tab to view your Ego JWT:
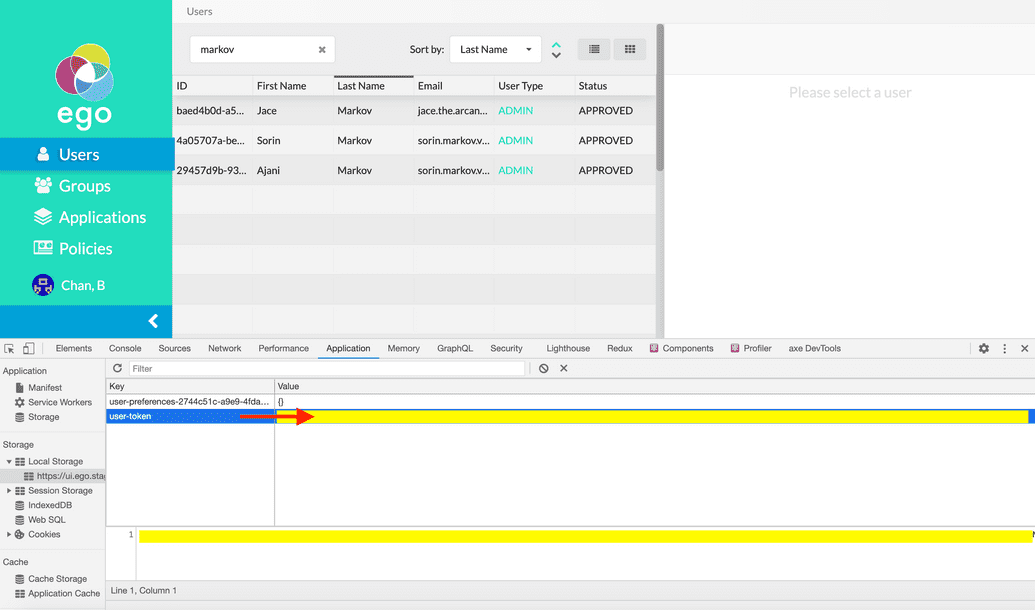
Alternatively, you can click the Application tab, go to Local Storage on the left, and select the Ego Admin UI URL and view your user-token. The user-token value also contains your EGO JWT and can you similarly copy it from here:
- Copy and record your JWT and keep it secure and safe. Only you should have access to your JWT. We will subsequently use it to authorize with the Ego API.
Generating an API Key for a User
Next, we will use the Ego API to generate an API Key for another user, so that they have WRITE access to both Song and Score.
Check Prerequisites
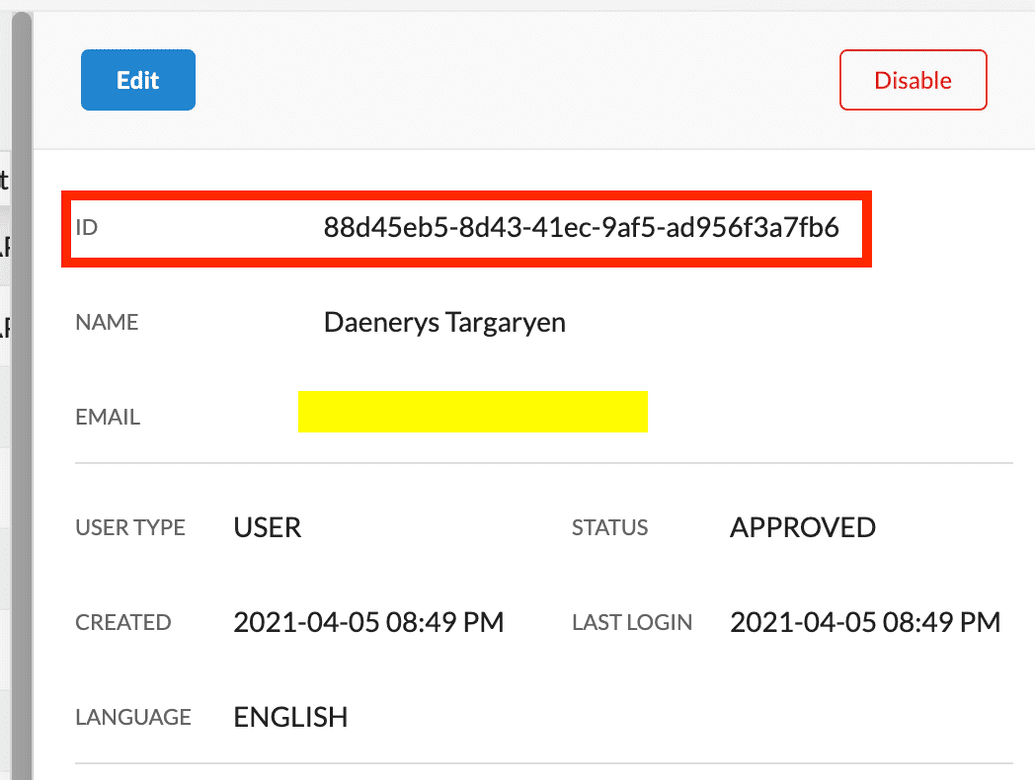
- From the Ego Admin UI, click Users from the lefthand menu, then select the user for which we need to generate the API Key. Their profile is displayed. Copy their
IDsince it must be supplied later to the relevant endpoint:
- Next, click Applications from the lefthand menu and make sure the required applications you want the API Key to be generated for have been configured (for instructions, see here). For our example, we want to provide access to the Song and Score applications:
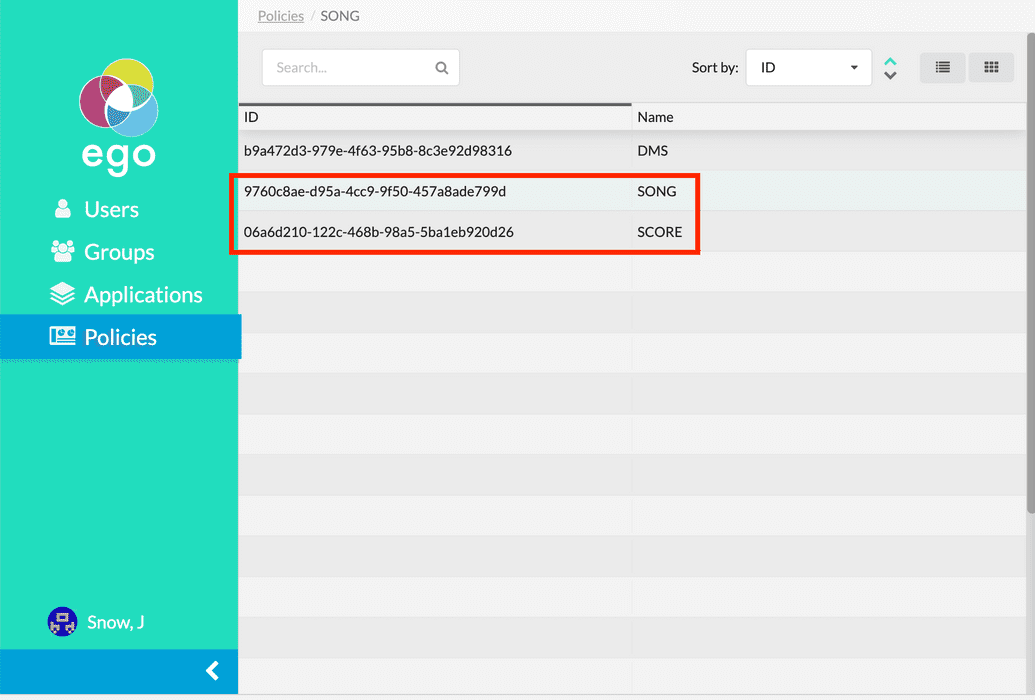
- Next, click Policies from the lefthand menu and make sure the required policies you want the API Key to be generated for have been configured (for instructions, see here). For example, we want to have policies for the Song and Score applications:
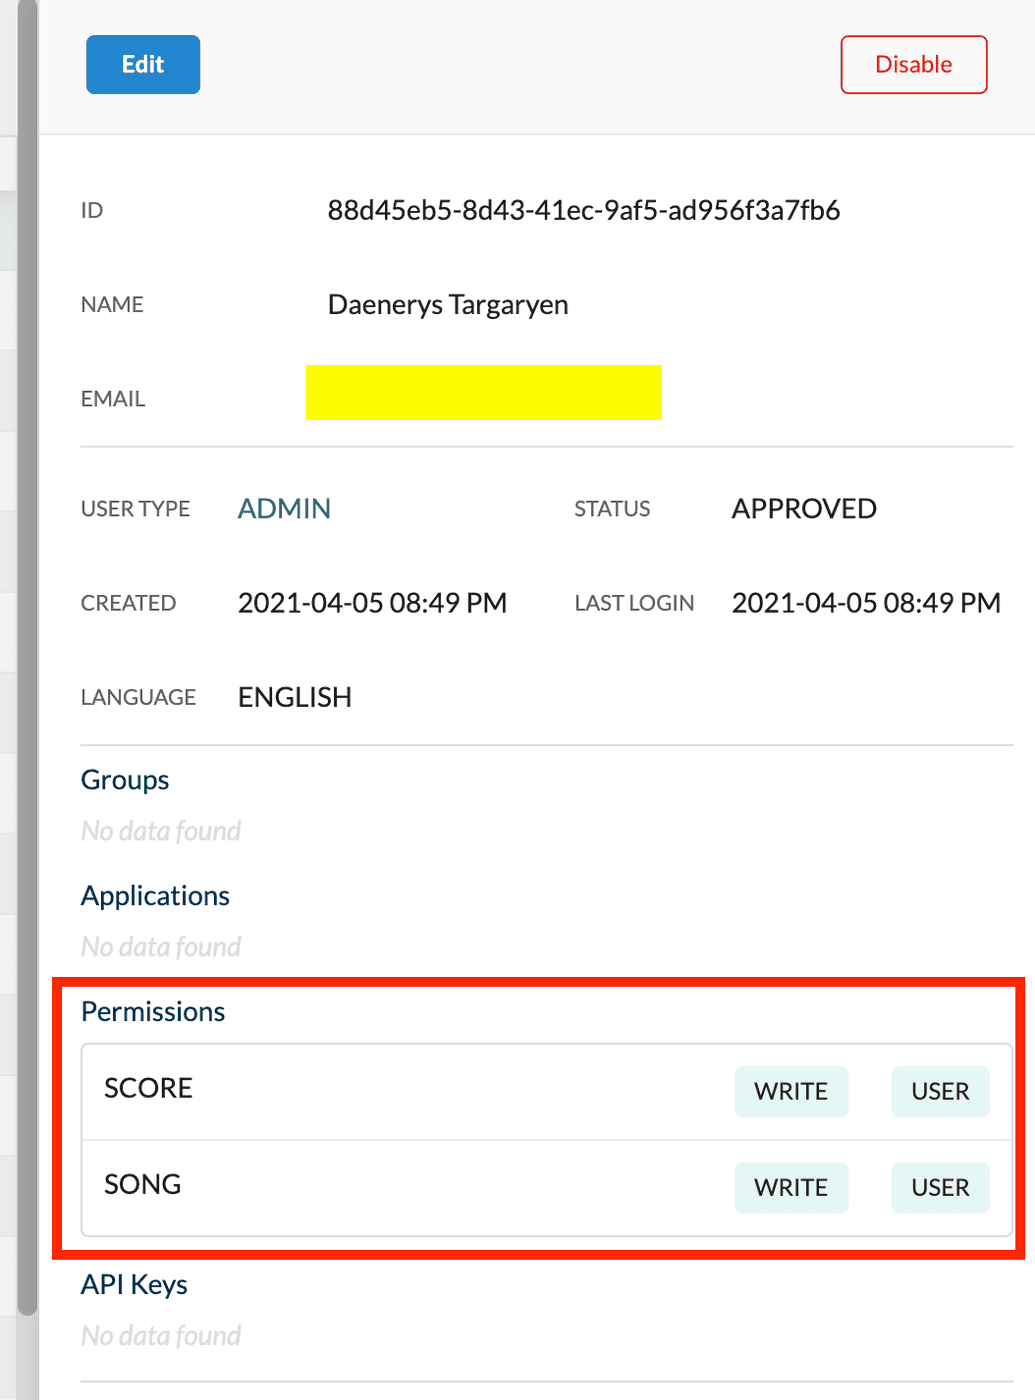
- Next, make sure the user you want to generate the API Key has the necessary permissions (scopes) already assigned to their profile. If the user does not have the scopes assigned, the key cannot be generated:
- If everything is in order, then we can proceed to use the Ego API to generate an API Key for the user. We can do this in two ways, either using the Swagger UI, or using a cURL command.
 Tip
Tip
The example we provide here is applicable to all Ego API endpionts. Using other endpoints follows a similar process, where you must first authorize with the API, then supply the necessary input parameters to the desired endpoint. Both Swagger UI and cURL are available to make requests to the API.
Using Swagger UI
To generate the API Key via the Swagger UI:
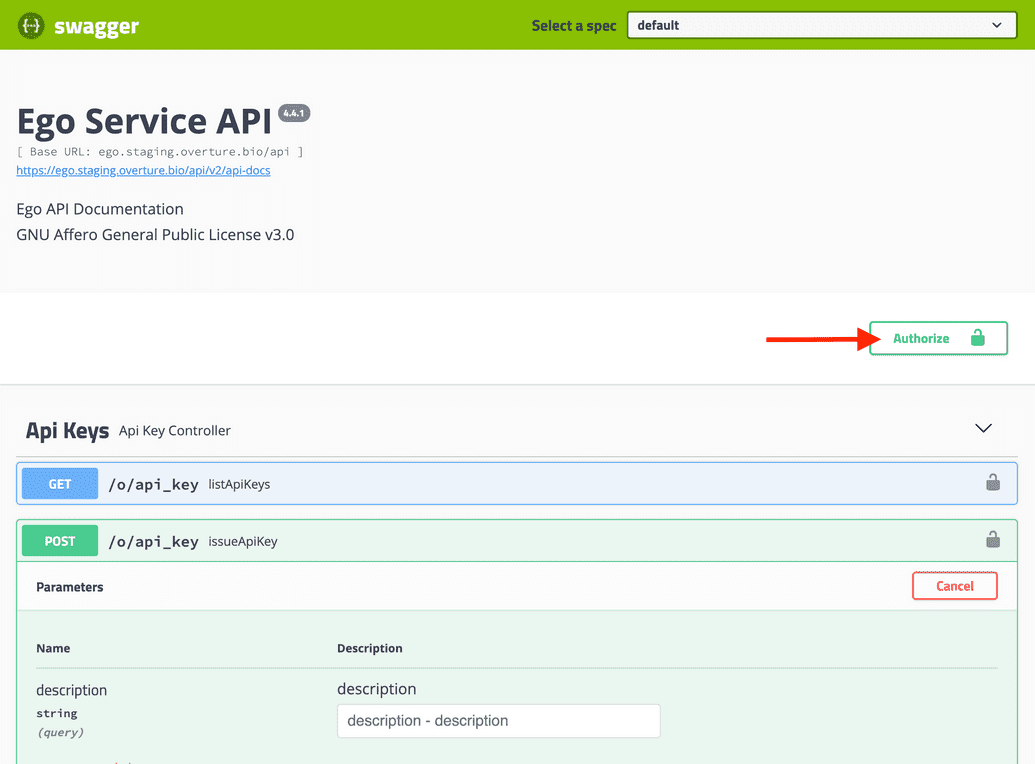
Go to the swagger UI for your installation at
<url>/ego-api/swagger-ui.html, where<url>is the base URL you have deployed Ego.In the top right, click the Authorize button (open lock icon):
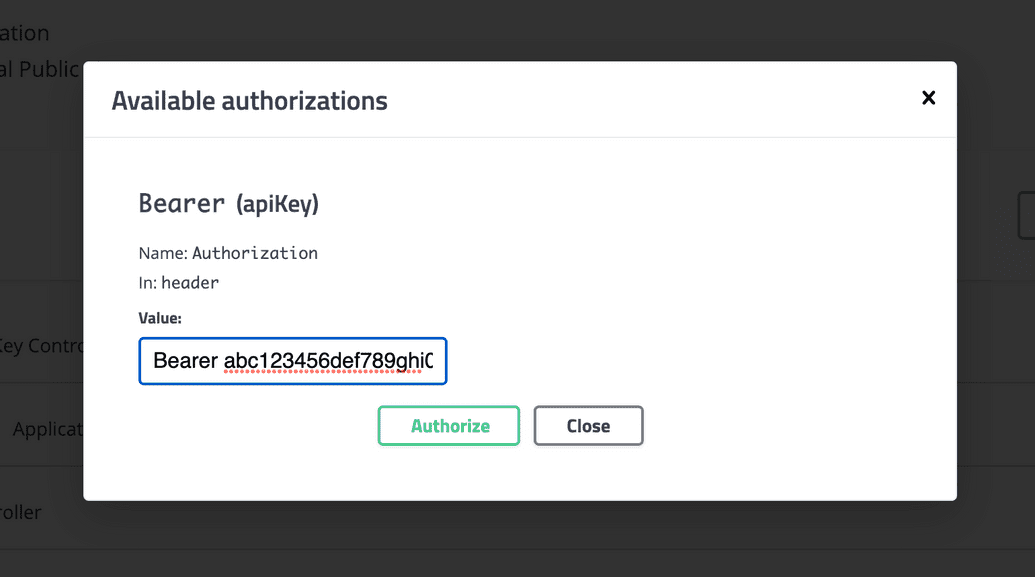
- A dialog appears asking you to authorize with the API. In the
Valuebox, enter the following:
Bearer <JWT>
Where <JWT> is the Ego Admin JWT you recorded earlier in the prerequisite steps.
- Click Authorize:
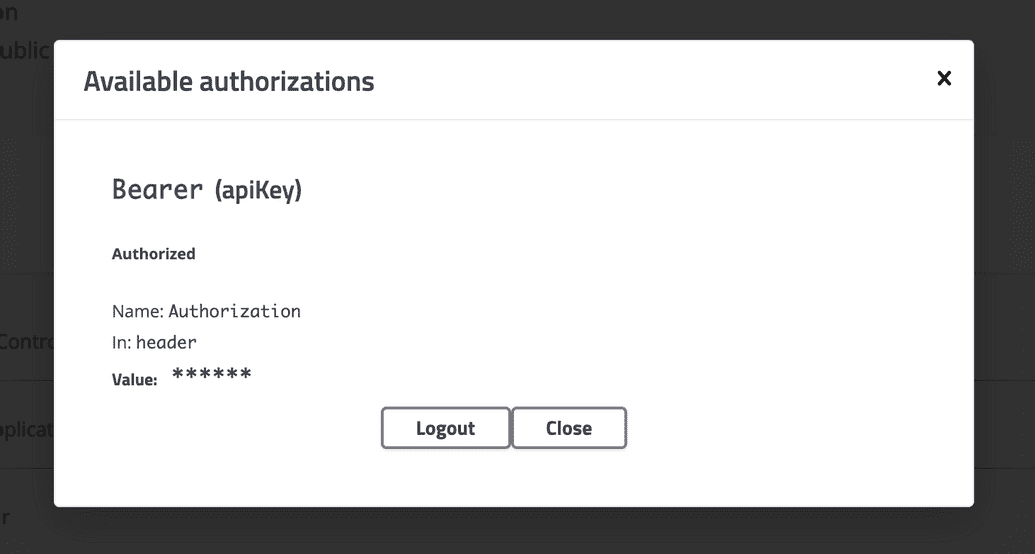
- If successful, the open lock icon becomes closed, and the dialog will show a Logout button:
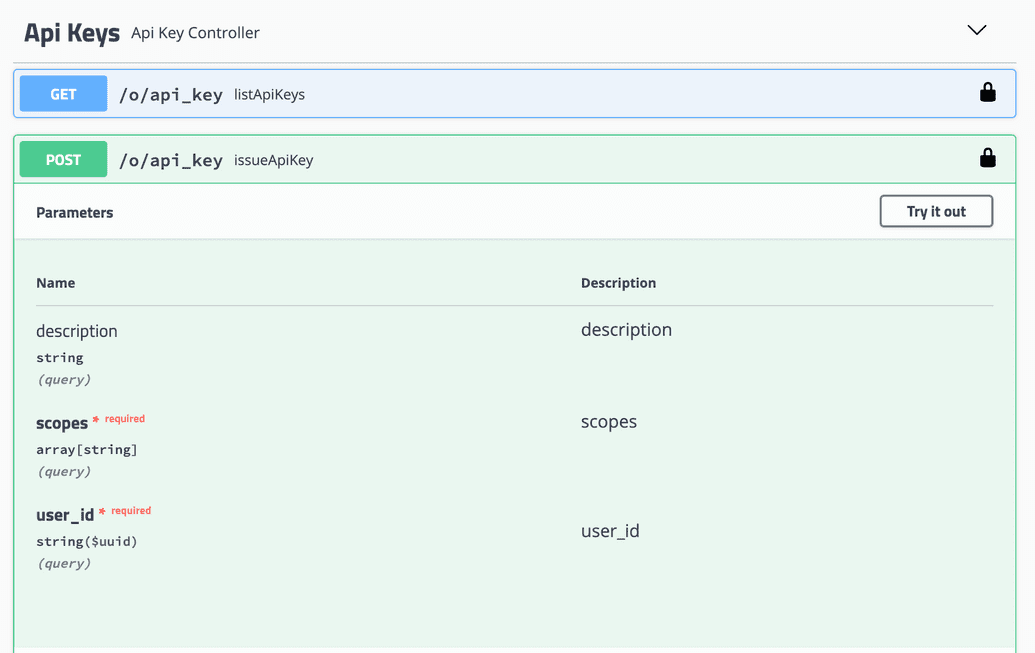
- We are now authorized to use the endpoints. Under the Api Keys section, click the
POSTendpoint calledissueApiKey. The endpoint input parameters are displayed:
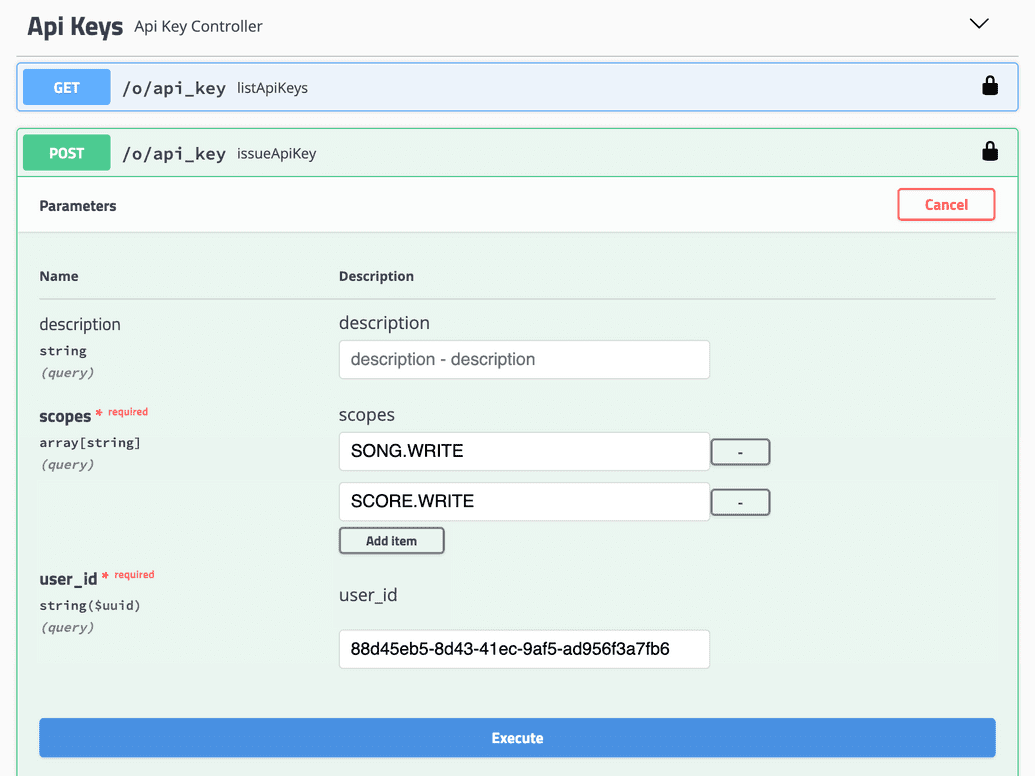
- Click Try it out. You can now enter the parameters needed to generate the API Key:
| Param | Description |
|---|---|
| description | Optional description of the API Key being generated. |
| scopes | Enter the specific scopes or permissions to grant for this API Key. In our example, we want to provide WRITE access to the SONG and SCORE policies. Hence, we add an entry for each of SONG.WRITE and SCORE.WRITE. |
| user_id | ID of the user that you recorded earlier from the Ego Admin UI, for whom this API Key is being generated. |
- Click Execute. If successful, the Responses section will show a response indicating the API Key was generated:
{"name": "1a1a72a4-224f-41a0-9825-c0dacadba228","scope": ["SONG.WRITE","SCORE.WRITE"],"expiryDate": "2021-05-06T01:42:35.228+0000","issueDate": "2021-04-06T01:42:35.228+0000","isRevoked": false,"description": null}
- You can also log back into the Ego Admin UI and check that an
ACTIVEAPI Key with the correct permissions has been generated in that user's profile:
Using cURL
To generate the API Key via a cURL command:
Open a command line terminal session.
Execute the following cURL command:
curl -X POST "<url>/ego-api/o/api_key?scopes=<scope1>&scopes=<scope2>&user_id=<userId>" -H "accept: application/json" -H "Authorization: Bearer <JWT>"
Where:
<url>is the base URL you have deployed Ego to<scope1>,<scope2>, etc. are the specific scopes you want to assign - In our example it will beSONG.WRITEandSCORE.WRITE<userId>is the internal Ego ID for the user that the API Key is being generated for<JWT>is the Ego Admin JWT you recorded earlier
For example:
curl -X POST "https://dms.test.cancercollaboratory.org/ego-api/o/api_key?scopes=SONG.WRITE&scopes=SCORE.WRITE&user_id=88d45eb5-8d43-41ec-9af5-ad956f3a7fb6" -H "accept: application/json" -H "Authorization: Bearer <JWT>"
- If successful, the response will indicate the API Key was generated:
{"name":"5c93077b-bcd6-4840-bad2-5dc3672eec50","scope":["SONG.WRITE","SCORE.WRITE"],"expiryDate":"2021-05-06T02:13:34.559+0000","issueDate":"2021-04-06T02:13:34.559+0000","isRevoked":false,"description":null}
- You can also log back into the Ego Admin UI and check that an
ACTIVEAPI Key with the correct permissions has been generated in that user's profile:
Supported Endpoints
The Ego API's Swagger UI provides interactive API documentation and lists all the supported endpoints in an easy-to-use web interface.
The Swagger UI for your installation can be accessed at <url>/ego-api/swagger-ui.html, where <url> is the base URL you have deployed Ego to (e.g. this could be a specific domain name you have setup in advance, or a server address, or even your localhost if you are running this off your laptop). For example, https://ego.overture.bio/ego-api/oauth/login/linkedin, https://dms.test.cancercollaboratory.org/ego-api/oauth/login/linkedin, http://localhost:80/ego-api/oauth/login/linkedin, etc.
