Using the Data Portal
The following sub-sections describe how to perform common tasks in the Data Portal that an end user would be interested in.
Logging Into the Portal
A user may need to log into the Portal so that they can generate an API token to use for data upload or download tasks.
To log into the Portal, from any page:
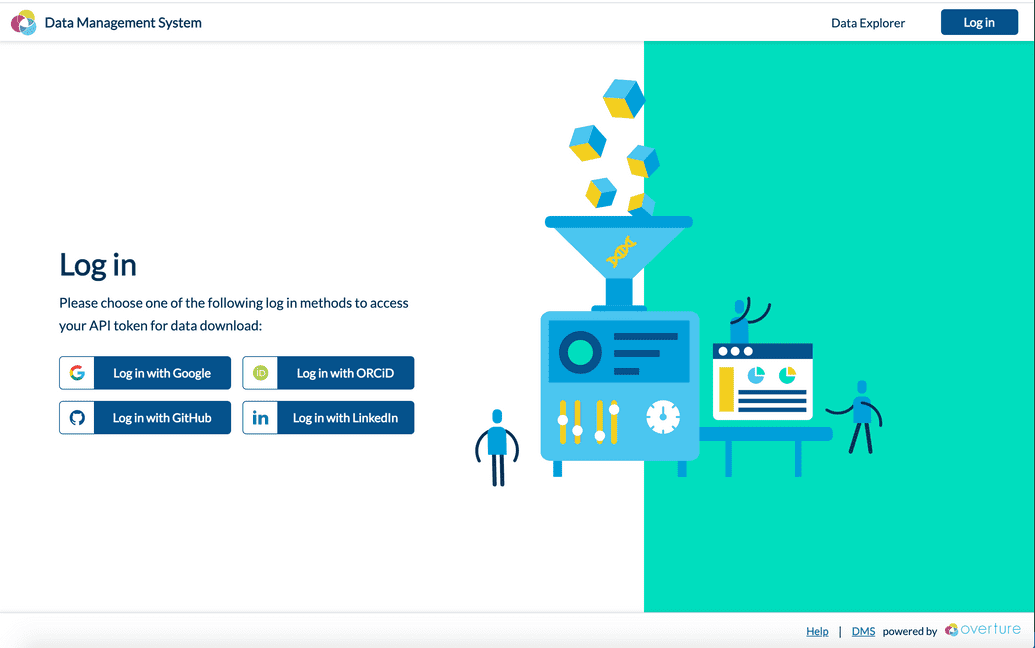
- Click Login in the top-right corner in the header. The login page is displayed:
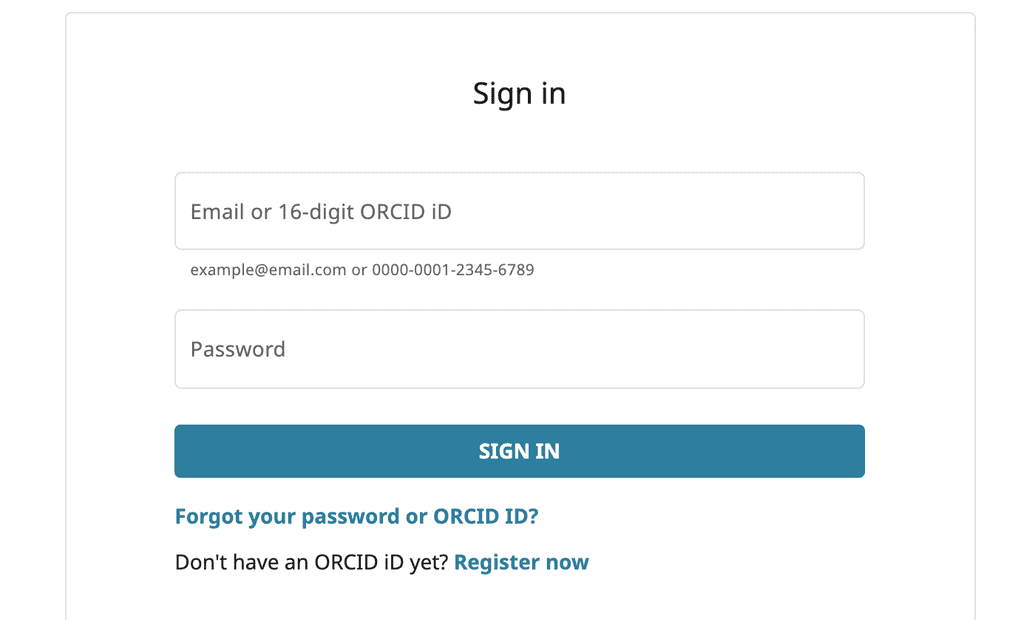
- Select the identity provider that you wish to login with. The following example uses ORCiD:
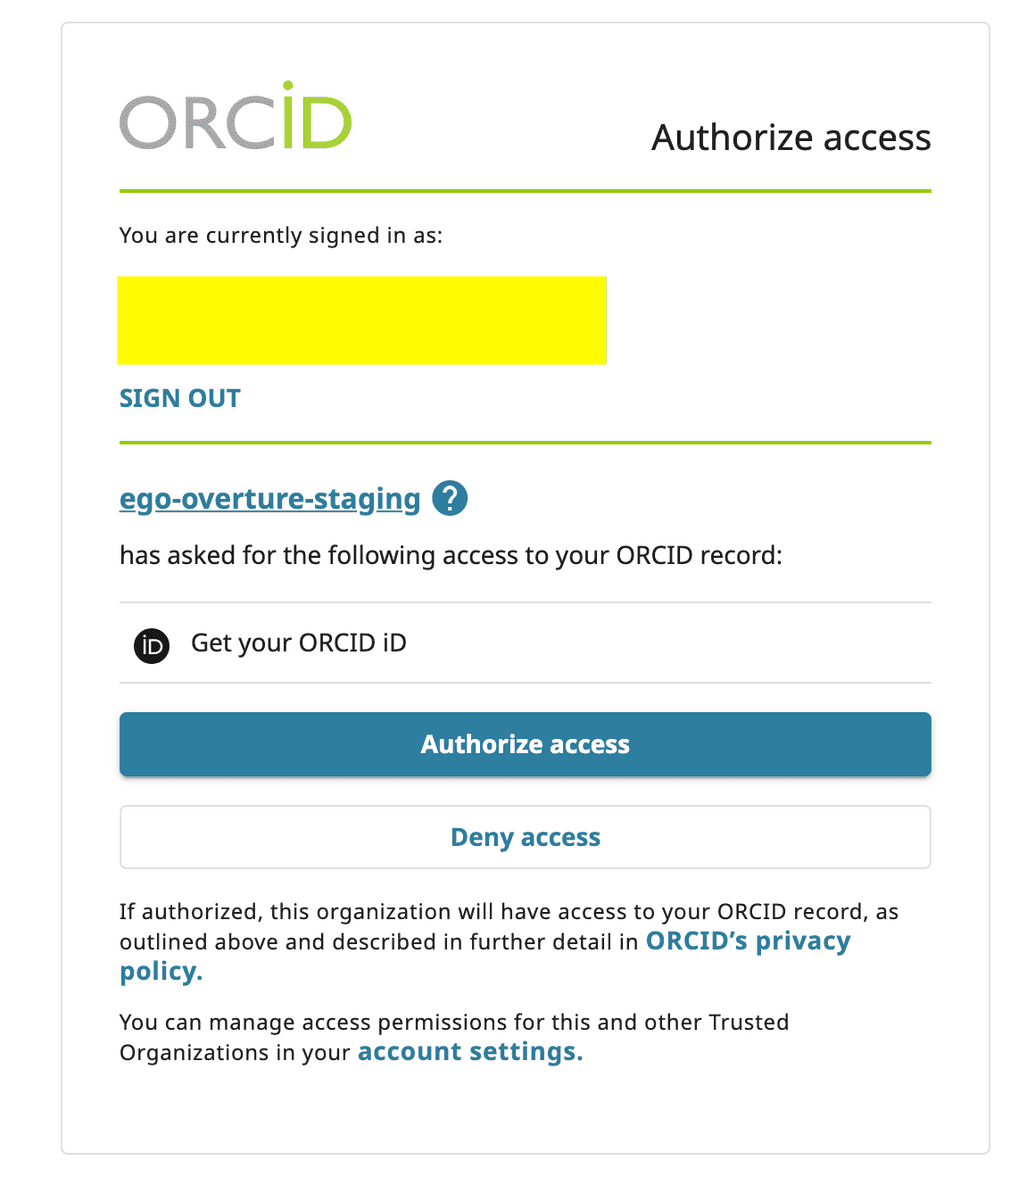
- Grant access to the DMS platform to your profile on the identity provider. For example:
NOTE: If you deny access to the DMS platform, then your only alternative is to log in again with a different identity provider with which you are comfortable granting access.
- After granting access, if the email address on your identity provider profile is not configured to be publicly accessible, you may receive an error message indicating so:
If the identity provider you are using allows such a setting, you must change the email to be accessible. For instructions on how to do so, see here. However, if you do not wish to make your email accessible for that provider, your only alternative is to log in again with a different provider that does not have such a setting, or for which you do not mind exposing the email.
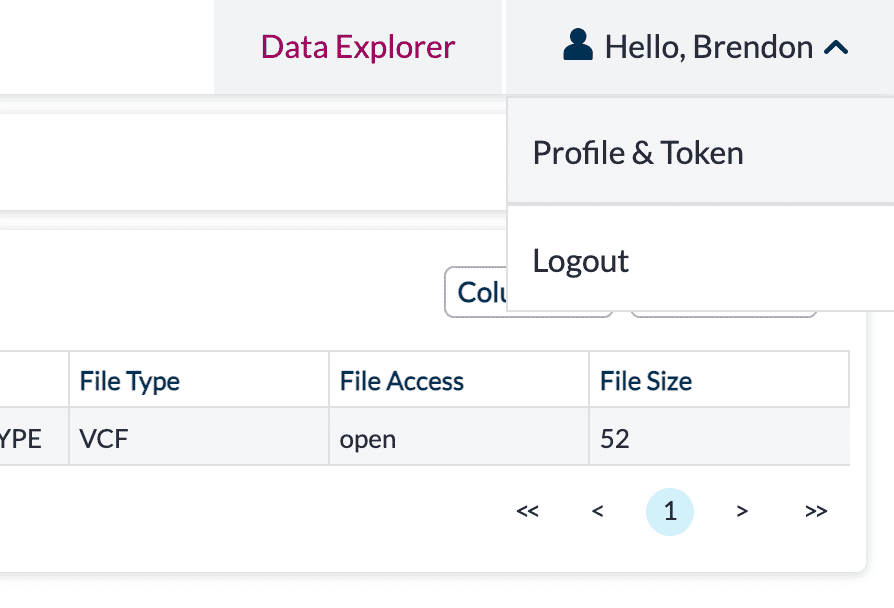
- Once successfully logged in, the name from your identity provider profile is displayed in the top right, and the Profile & Token page is accessible:
Searching for Data
To explore and search for data in the Portal:
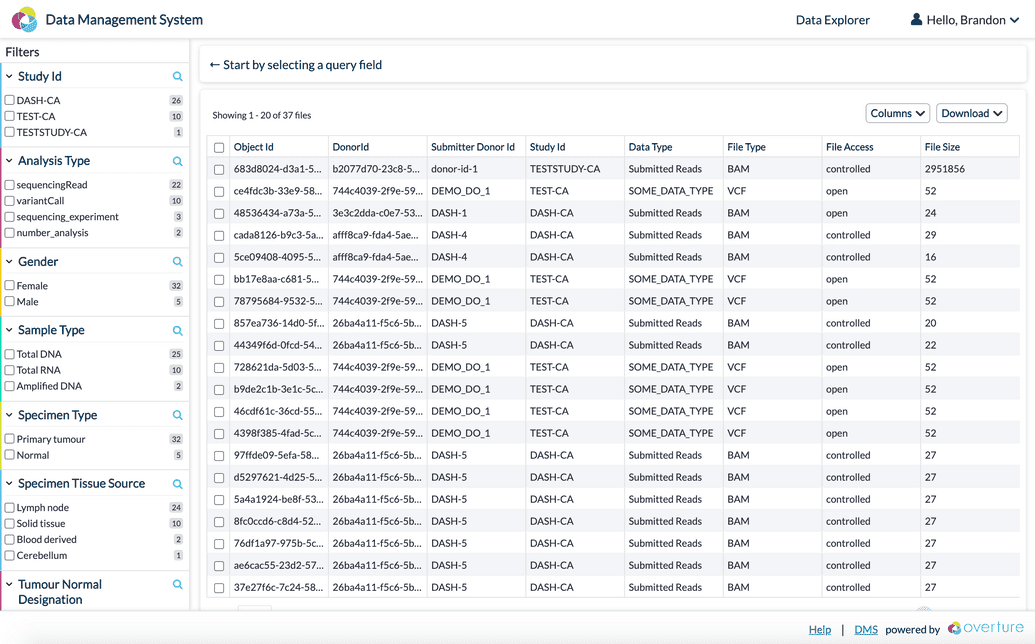
- Click Data Explorer in the top-right in the header. The Data Explorer page appears:
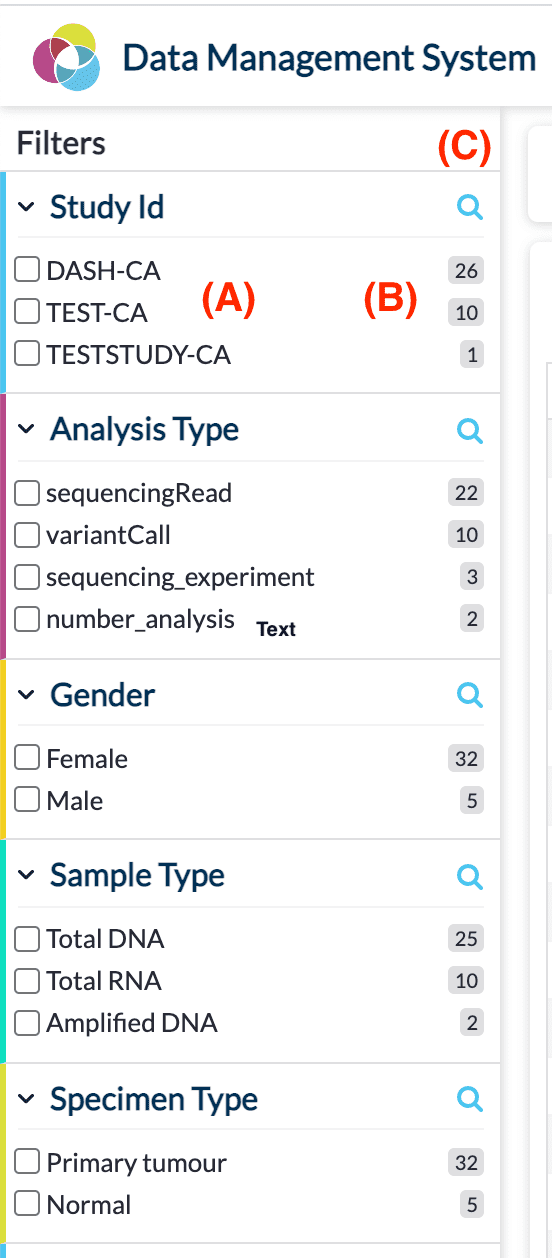
- Use the Filters in the left-hand control panel to query the data that is available. Each individual filter represents a field that can be queried on based on its available values and has several controls:
(A) The list of available values for that field are displayed. Clicking the checkmark beside a value will filter the data table to show only records that match that field value.
(B) For each of the fields available values, a count (or aggregation) is displayed to the right of it, indicating how many records in the data set contain this value.
(C) Click the magnifying glass control to display a text search box that lets you search for a specific value for that field. This is useful when the list of values for a field is very long.
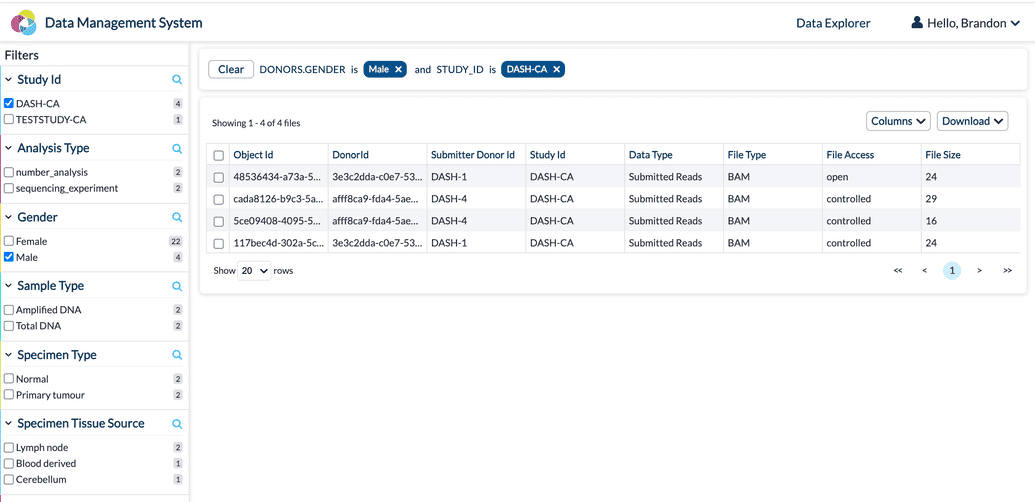
- As you select different filters, your query is dynamically built and the query parameters are displayed above the results table. The results table itself, in the middle of the page, dynamically refreshes with updated results based on your query:
- You can use the Columns control in the top-right of the results table to hide or show field columns depending on your exploration needs:
- You can use the Download control to export and download the following files:
| File | Description |
|---|---|
| Table TSV | A TSV export of the data records in the results table. If no rows are selected, all records are exported. Otherwise, if specific rows are selected, only those records are exported. |
| Manifest | A file manifest in a specific format, with specific data columns, that you can use to download the files listed in the manifest from Score. A manifest is useful when you have a large number of files to download and it is easier to simply supply a manifest to the Score command-line client. If no rows are selected, all records are included in the manifest. Otherwise, if specific rows are selected, only those records are included in the manifest. |
Accessing Your User Profile
Once you have logged in, you can manage various aspects of your DMS user profile.
To access your profile, click your display name, then select Profile & Token in the top-right in the header.
Your profile is displayed showing your name (as captured from your identity provider), your contact email (as captured from your identity provider), and the identity provider that you have logged in with:
From your profile, you can now perform some additional functions as described below.
Generating Your API Token
An API token is required for performing certain secure operations with the DMS services and/or its APIs. For example, uploading and downloading data to and from Score requires an API token.
A user can generate their own API token from the Data Portal UI once they have logged in and accessed their profile:
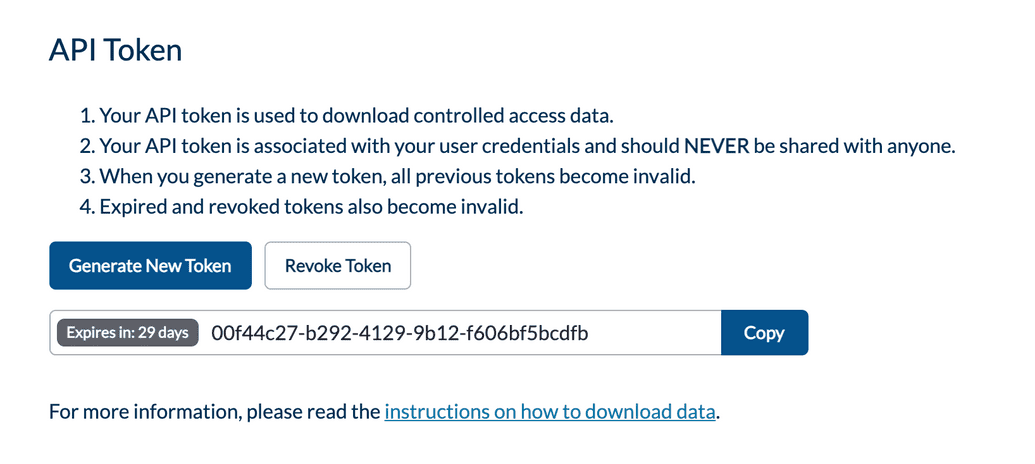
From your profile, click Generate Token. A new token is generated, with its validity period (in days) displayed to its left. Record and remember your token value and keep it safe and secure. You can easily copy the value to your clipboard by clicking the Copy button:
NOTE: Generating a new API token automatically revokes all of your previous tokens.
Viewing an Expired API Token
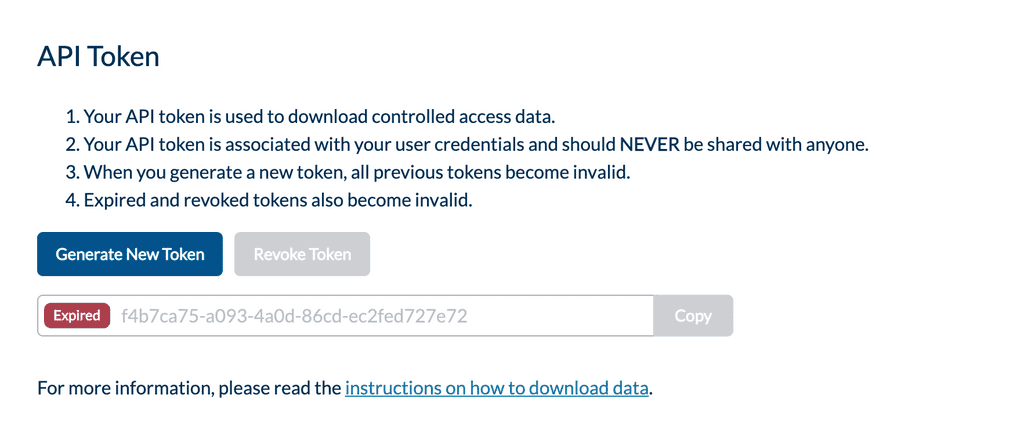
Expired tokens will appear in your profile with a status of Expired. Expired tokens can no longer be used and a new one must be generated. For example:
Revoking Your API Token
If required, a user can also revoke their API token. For example, if they no longer need it and want to be sure to dispose of it for security purposes.
A user can revoke their own API token from the Data Portal UI once they have logged in and accessed their profile:
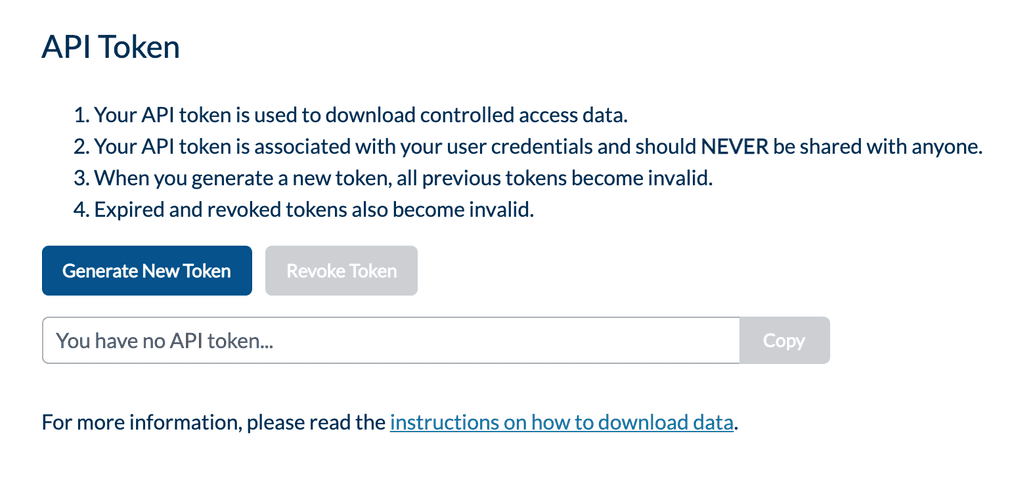
From your profile, click Revoke Token. Once revoked, the token value disappears, the Revoke Token becomes disabled, and the user is free to generate an entirely new token again if and when they need:
Logging Out of the Portal
To log out at any time, click your display name, then select Logout in the top-right in the header. Once logged out, you are automatically redirected to the Data Explorer.
