Setup Identity Provider Secrets
The Overture DMS supports the use of OAUTH 2.0 identity providers for authentication via the Ego service. To properly use the identity providers with Ego, OAUTH credentials must be setup with each provider you want to use, specifically a client ID and client secret.
The secret is known only to your web application and the provider's authorization server. It serves to protect your resources by only granting tokens to authorized requestors.
Each identity provider has a different process for setting up their client secrets, detailed below.
If you or your organization needs a secure solution to store, manage, and control access to all your secrets in one place, you may wish to consult with your IT department about adopting a 3rd party tool such as HashiCorp's Vault.
For full details on setting up OAUTH 2.0 for an application to work with Google, see here.
However, specifically for the DMS setup, see the summary steps below for acquiring a Google client ID and secret:
- Setup an account with Google Developer Console, if you don't already have one. If you are an individual working solo with the DMS platform, you may wish to simply use a personal account. However, if you work for a larger organization or institution, they may already have a designated account which you can or should be using. Please consult your IT department if required.
- Log into Google Developer Console.
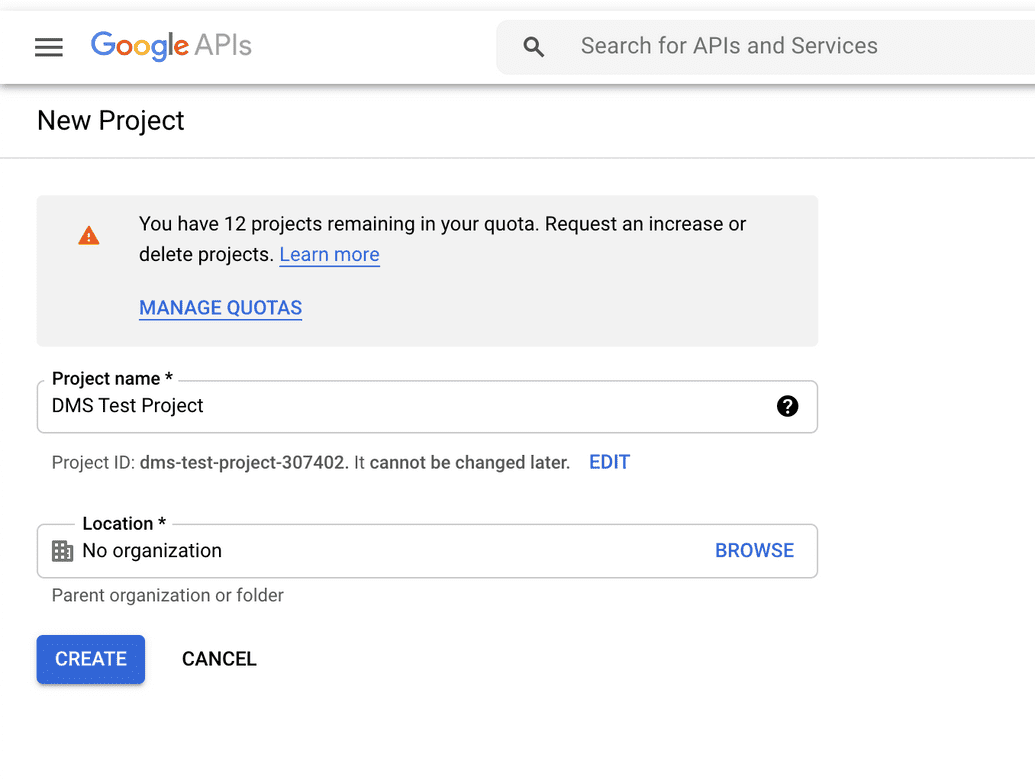
- Go to Dashboard and select the existing project where you want your application to exist, or create a new one:
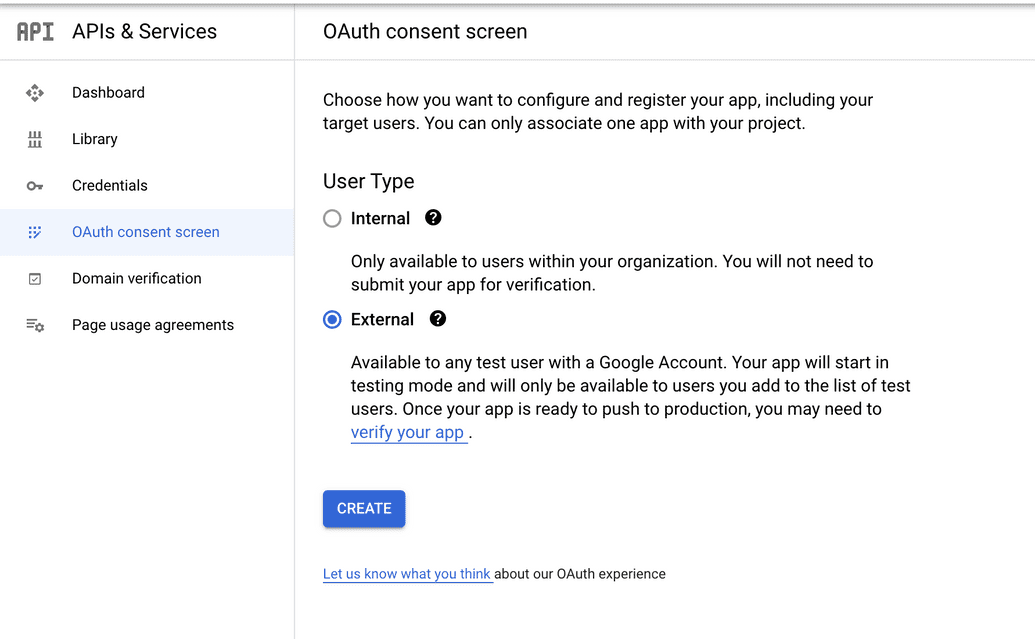
- Go to the OAuth consent screen to register your application with your project. Only one app can be registered per project:
- Select the User Type:
| User Type | Description |
|---|---|
| Internal | If you are part of a Google Workspace, then this setting limits the app to only users within your workspace. |
| External | The app will be available to any test user that has a Google account. The app starts in testing mode and is only available to users you add to the list of test users. Once testing is complete, you can verify and publish the app to production. |
NOTE: Typically, External is the recommended configuration, especially if you intend for other external users to access and use the DMS.
- Click Create:
- You will need to fill in a series of other sections. Under App Information, set the following:
| Field | Description |
|---|---|
| App name | Name for the app requiring consent. Typically just set this to something simple such as, "DMS". |
| User support e-mail | For users to contact you with questions about their consent. |
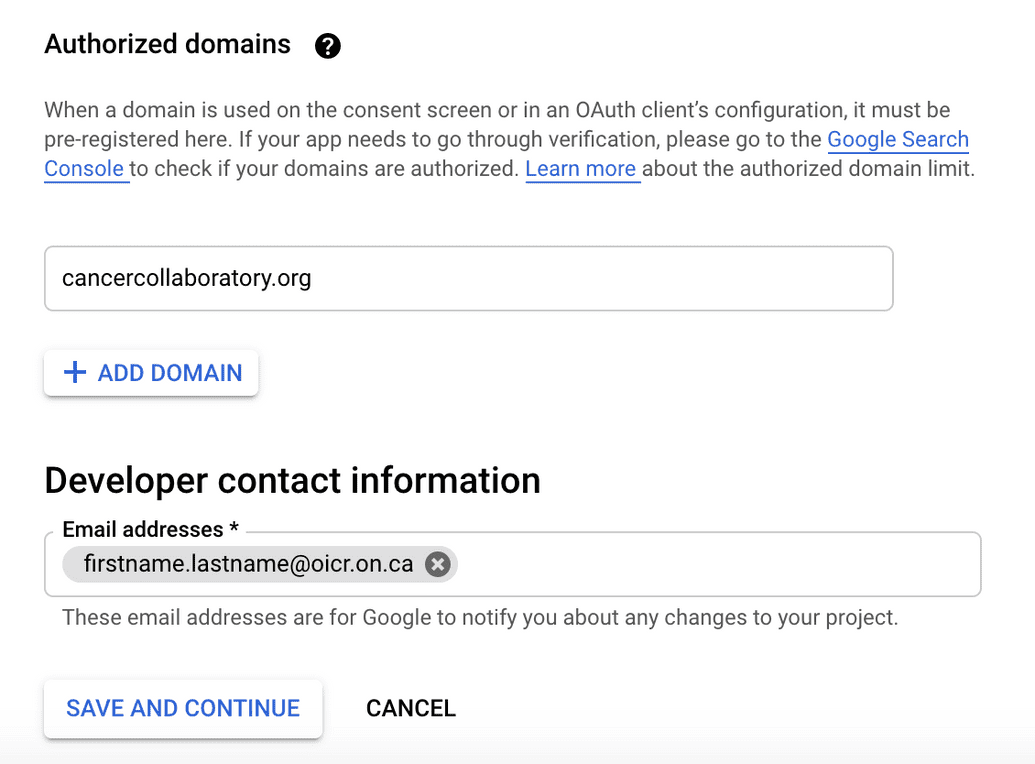
- If you plan to deploy DMS in server mode (NOT local), then under Authorized Domains, add the top-most level of the domain that you will be configuring in the DMS Gateway (e.g.
cancercollaboratory.org). Then under Developer Contact Information, enter an e-mail address for Google to notify you of any changes to your project:
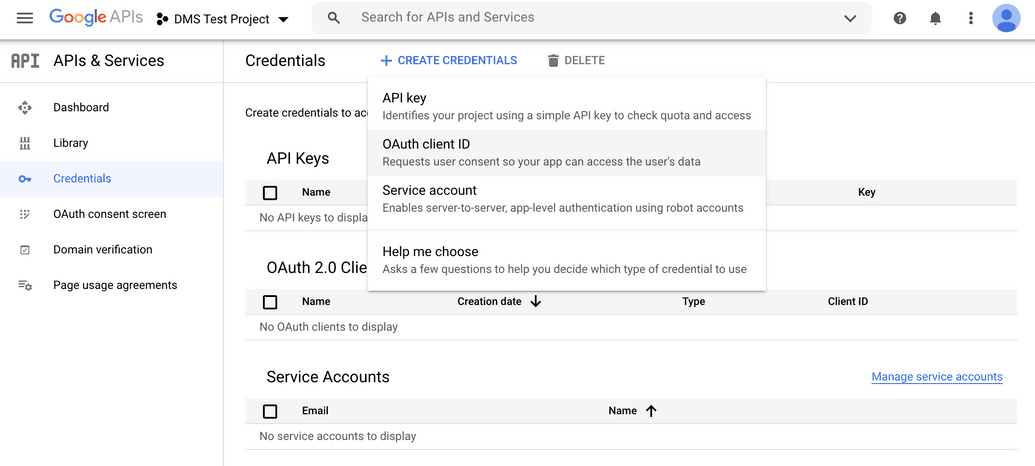
- Go to Credentials to setup your client ID and secret. Click Create Credentials and select OAuth client ID:
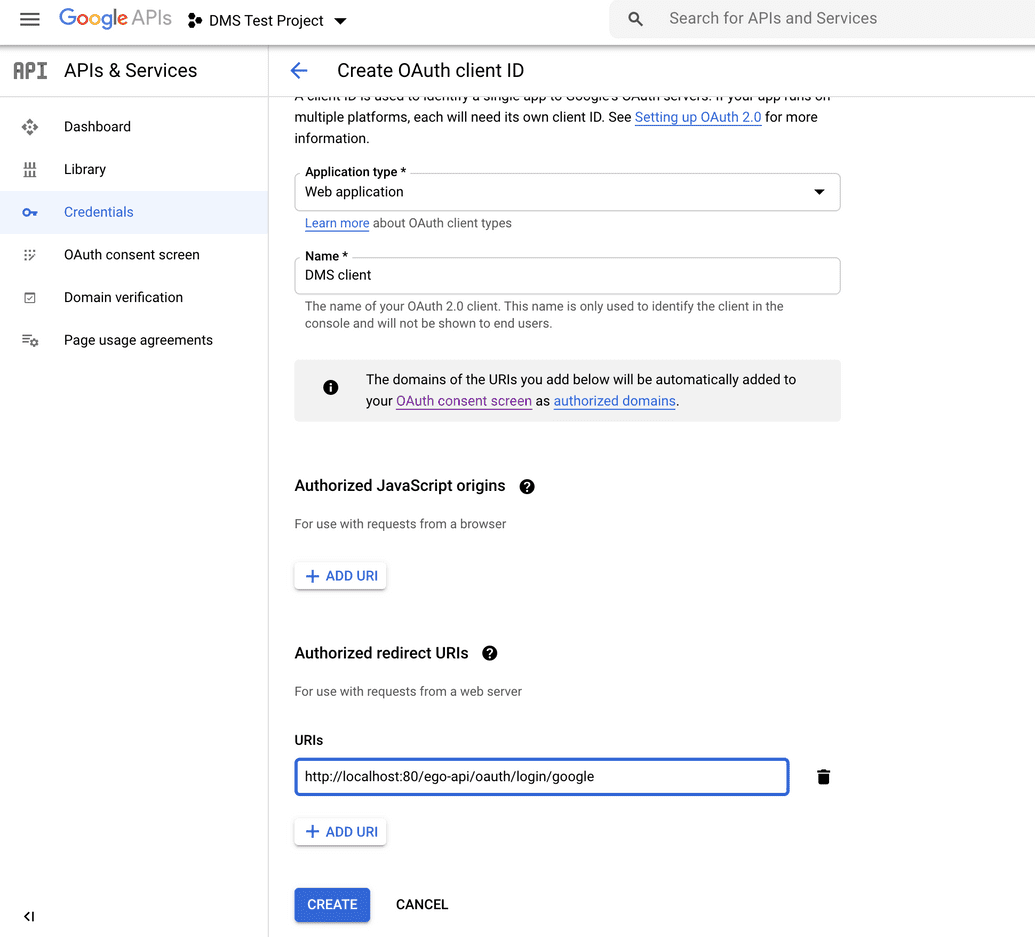
- Enter the following:
| Field | Description |
|---|---|
| Application type | Set to Web application |
| Name | Enter a name for the client, e.g. DMS client |
- Under Authorized redirect URIs, add a URI. This is the URI where Google will redirect users once they have authenticated with the provider (i.e. redirect them back to Ego once logged in successfully):
| Mode | URI |
|---|---|
| Local | http://localhost:<port>/ego-api/oauth/login/google |
| Server | https://<myDomain>/ego-api/oauth/login/google |
Where:
<port>is the port on which you will deploy the DMS Gateway in local mode<myDomain>is the registered domain you will configure for the DMS Gateway (e.g.dms.test.cancercollaboratory.org)
- Click Create:
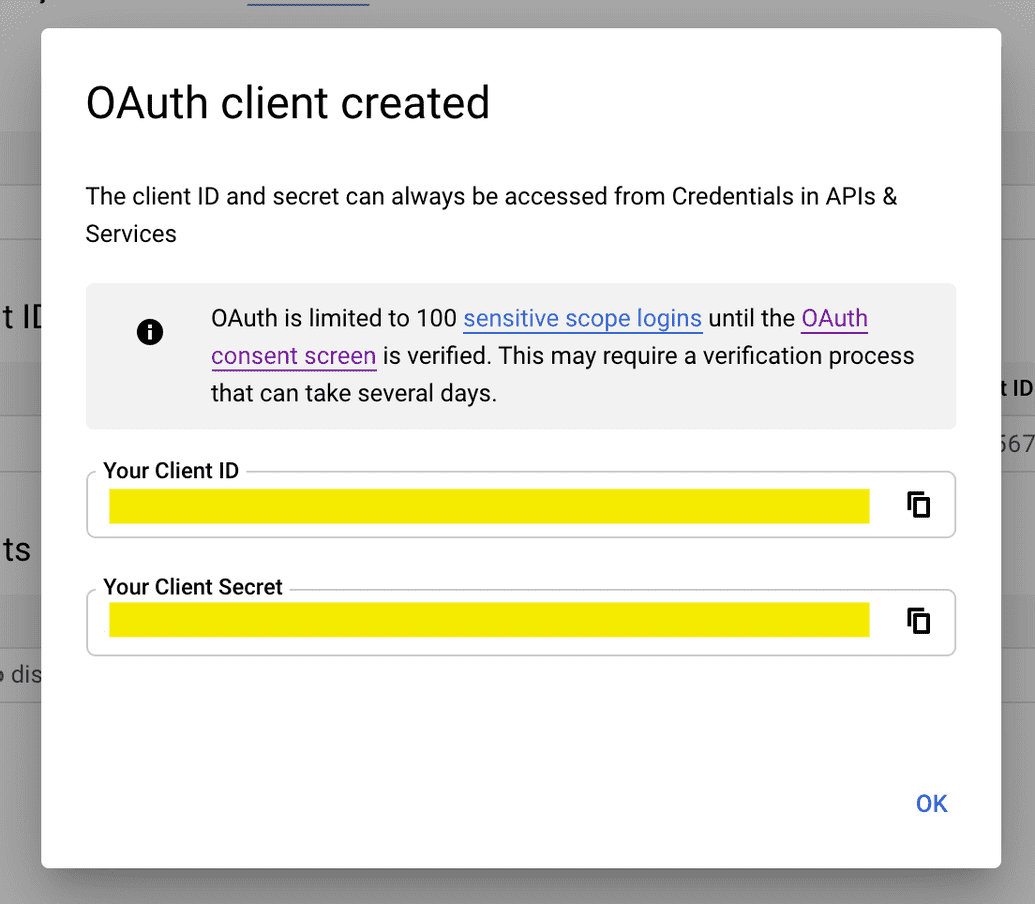
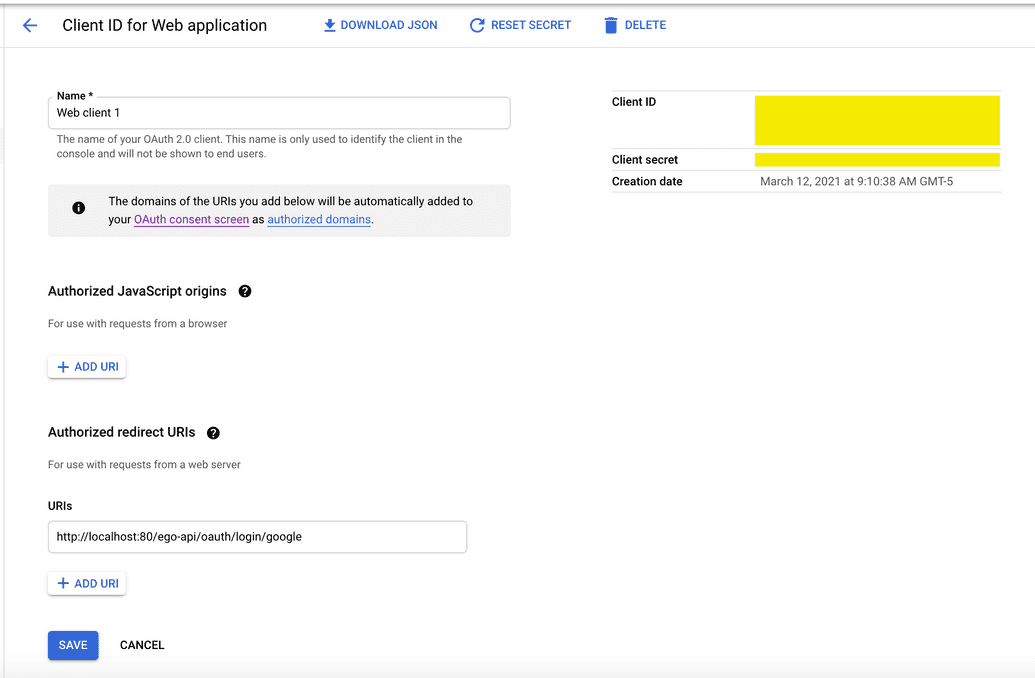
- The credentials for your app will be created and the Client ID and Client Secret will be displayed to you so you can copy them for use later. Keep these safe and secure. You can always access & view these values in Google Developer Console by viewing your Oauth Client ID details; the Client ID and Client Secret will be listed on the righthand side:
- You can now supply the Client ID and Client Secret to the DMS Installer in the Ego configuration section as required.
GitHub
For full details on setting up OAUTH 2.0 for an application to work with GitHub, see here.
However, specifically for the DMS setup, see the summary steps below for acquiring a GitHub client ID and secret:
Setup an account with GitHub, if you don't already have one. If you are an individual working solo with the DMS platform, you may wish to simply use a personal account. However, if you work for a larger organization or institution, they may already have a designated account which you can or should be using. Please consult your IT department if required.
Log into GitHub.
From your profile icon in the top right, go to Settings. Then from the links on the left, go to Developer Settings.
From the left, click OAuth Apps, then click New OAuth App:
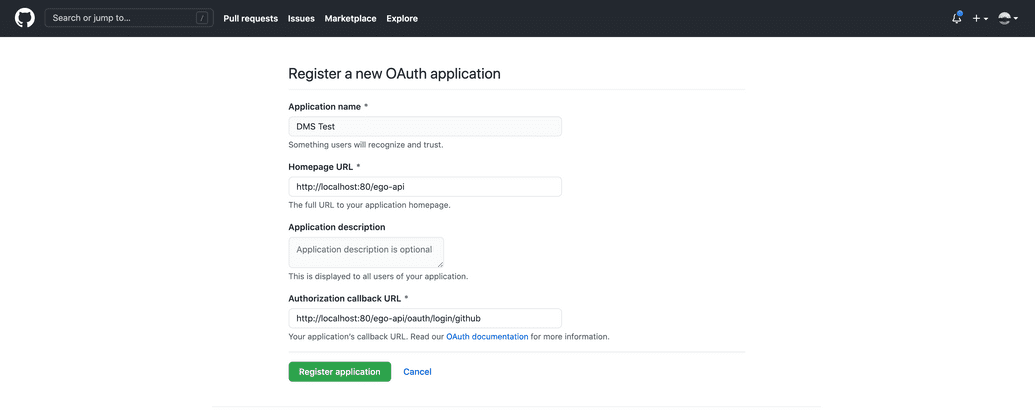
Enter the Application Name - A descriptive name for your app, e.g.
DMS Test App.Enter the Homepage URL - The URL to your app's homepage. You may simply enter the following:
| Mode | URL |
|---|---|
| Local | http://localhost:<port>/ego-api |
| Server | https://<myDomain>/ego-api |
Where:
<port>is the port on which you will deploy the DMS Gateway in local mode<myDomain>is the registered domain you will configure for the DMS Gateway (e.g.dms.test.cancercollaboratory.org)
- In Authorized callback URIs, enter the URL where GitHub will redirect users once they have authenticated with the provider (i.e. redirect them back to Ego once logged in successfully):
| Mode | URI |
|---|---|
| Local | http://localhost:<port>/ego-api/oauth/login/github |
| Server | https://<myDomain>/ego-api/oauth/login/github |
Where:
<port>is the port on which you will deploy the DMS Gateway in local mode<myDomain>is the registered domain you will configure for the DMS Gateway (e.g.dms.test.cancercollaboratory.org)
- Click Register application:
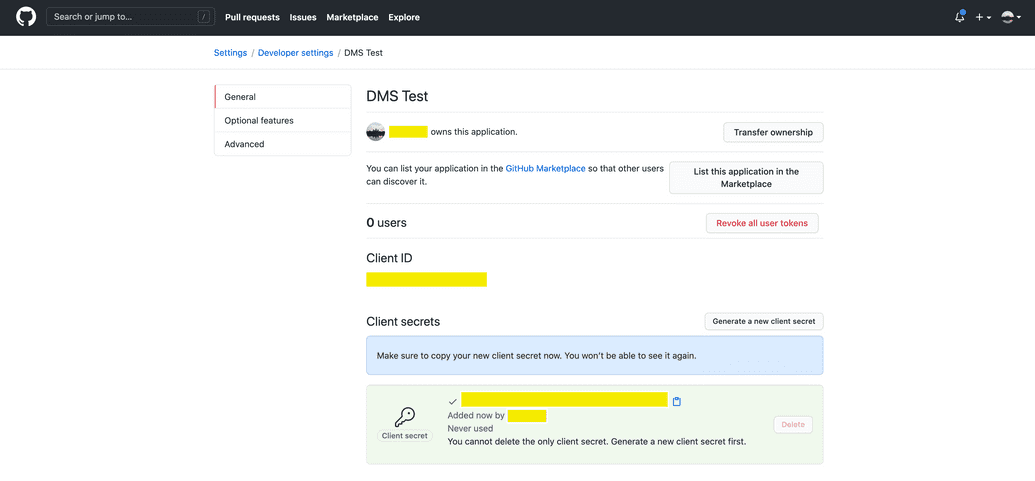
- After the app is registered, the Client ID and Client Secret will be displayed to you so you can copy them for use later. Keep these safe and secure.
NOTE: GitHub only displays the Client Secret when initially created. If you do not copy it immediately, you will not be able to see it again. If you do not copy it or lose/forget the secret later, you will need to generate a new secret and delete the old one.
You can always view the Client ID and manage (generate new, delete) the Client Secrets for your app by going back to your Developer Settings > OAuth Apps > General section in the app's lefthand navigation bar:
- You can now supply the Client ID and Client Secret to the DMS Installer in the Ego configuration section as required.
For full details on setting up OAUTH 2.0 for an application to work with LinkedIn, see here.
However, specifically for the DMS setup, see the summary steps below for acquiring a LinkedIn client ID and secret:
- Setup an account with LinkedIn Developers, if you don't already have one. If you are an individual working solo with the DMS platform, you may wish to simply use a personal account. However, if you work for a larger organization or institution, they may already have a designated account which you can or should be using. Please consult your IT department if required.
- Log into LinkedIn Developers.
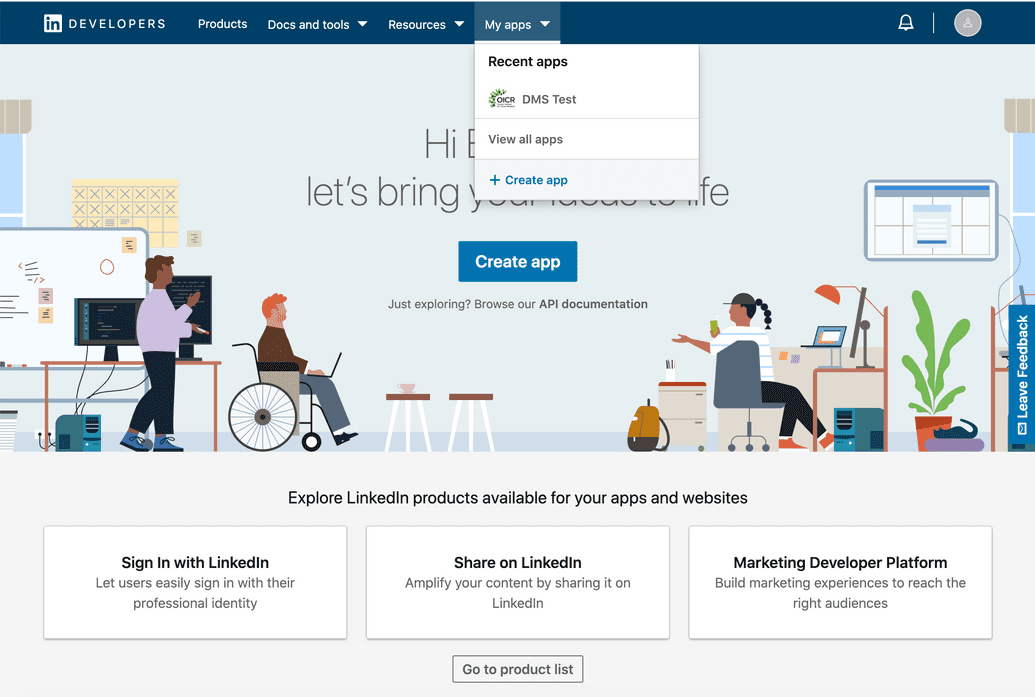
- Click My apps > Create app in the top menu:
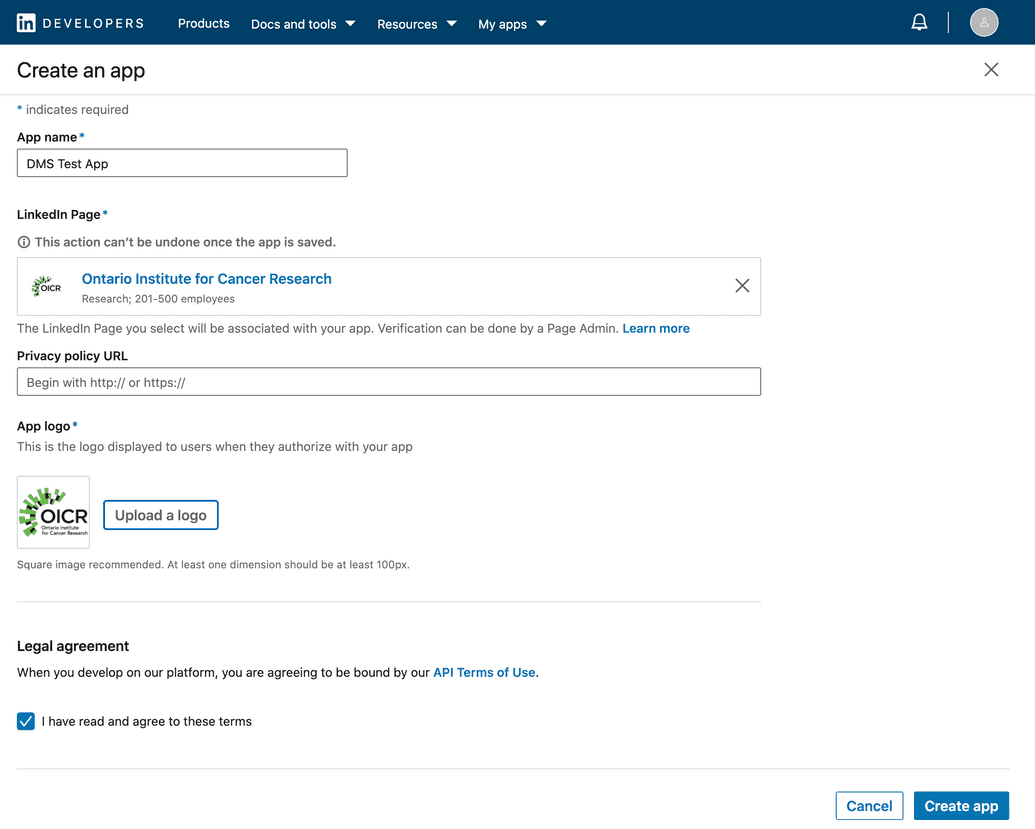
- Enter the following:
| Field | Description |
|---|---|
| App name | Descriptive name for your app, e.g. DMS Test App |
| LinkedIn Page | Enter or select the LinkedIn page to be associated with your app. If you do not have one, you can create one (either real or placeholder) by clicking Create a new LinkedInPage. |
| App logo | Upload a logo for your app |
| Legal agreement | Read and agree to the API Terms of Use |
- Click Create app:
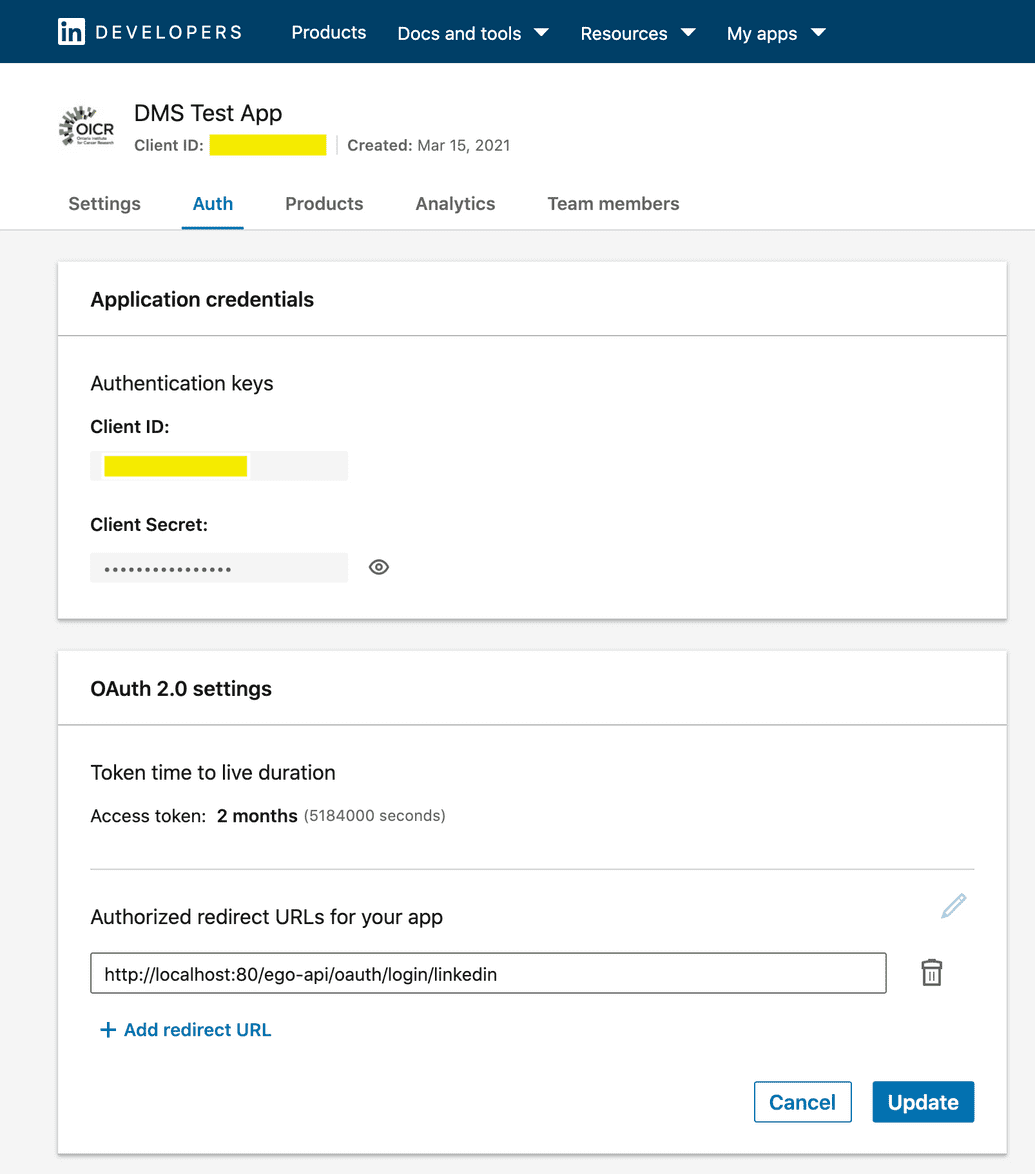
- After the app is registered, the Client ID and Client Secret will be displayed to you so you can copy them for use later. Keep these safe and secure. You can always access & view these values in by going to the Auth tab in the app's top-level navigation:
- In the app's top navigation menu, go to Auth and under OAuth 2.0 settings, add an Authorized redirect URL for your app. This is the URI where LinkedIn will redirect users once they have authenticated with the provider (i.e. redirect them back to Ego once logged in successfully):
| Mode | URI |
|---|---|
| Local | http://localhost:<port>/ego-api/oauth/login/linkedin |
| Server | https://<myDomain>:443/ego-api/oauth/login/linkedin |
Where:
<port>is the port on which you will deploy the DMS Gateway in local mode<myDomain>is the registered domain you will configure for the DMS Gateway (e.g.dms.test.cancercollaboratory.org)
NOTE: When entering the domain in LinkedIn for server mode, you must append the port :443 to the end of the domain. The true redirect URI sent by the DMS actually contains :443 suffixed to the domain. While other identity providers ignore or drop this suffix, LinkedIn requires the redirect URI to match exactly, hence :443 must be explicitly entered.
- You can now supply the Client ID and Client Secret to the DMS Installer in the Ego configuration section as required. However, LinkedIn requires a few additional steps before the process is complete.
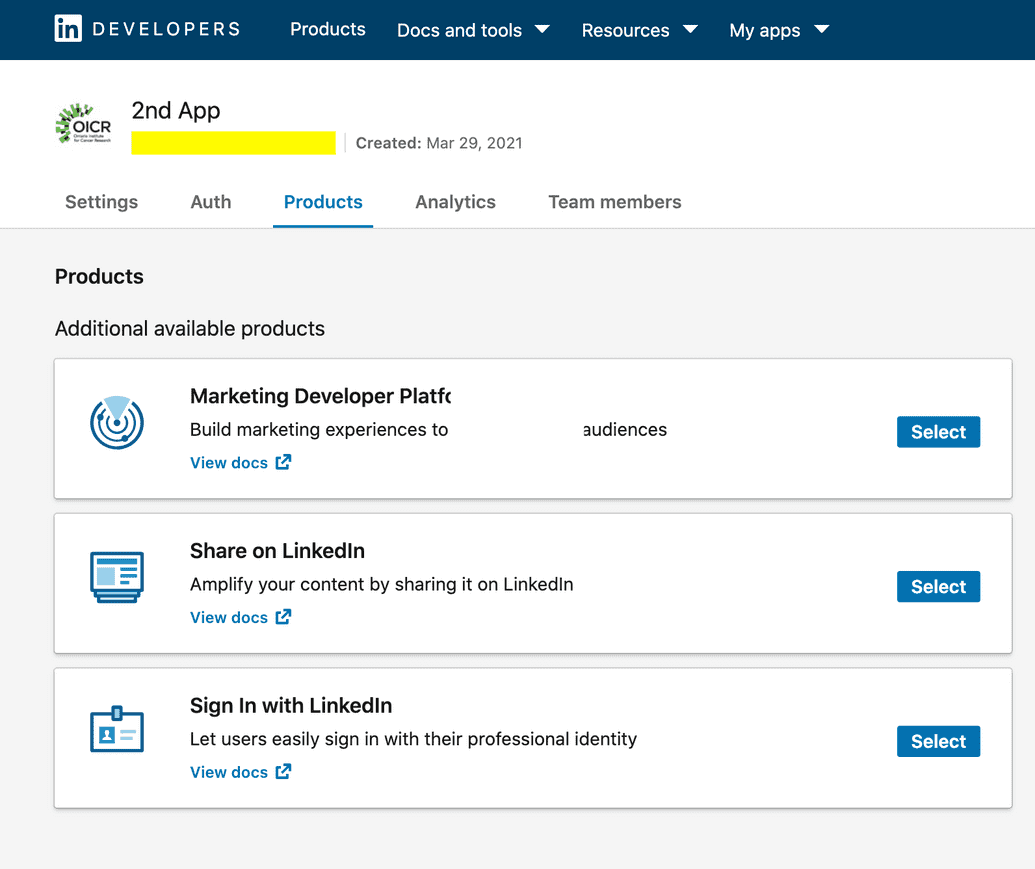
- Go to the Products tab and Select the Sign in with LinkedIn product. This allows LinkedIn users to sign into your app:
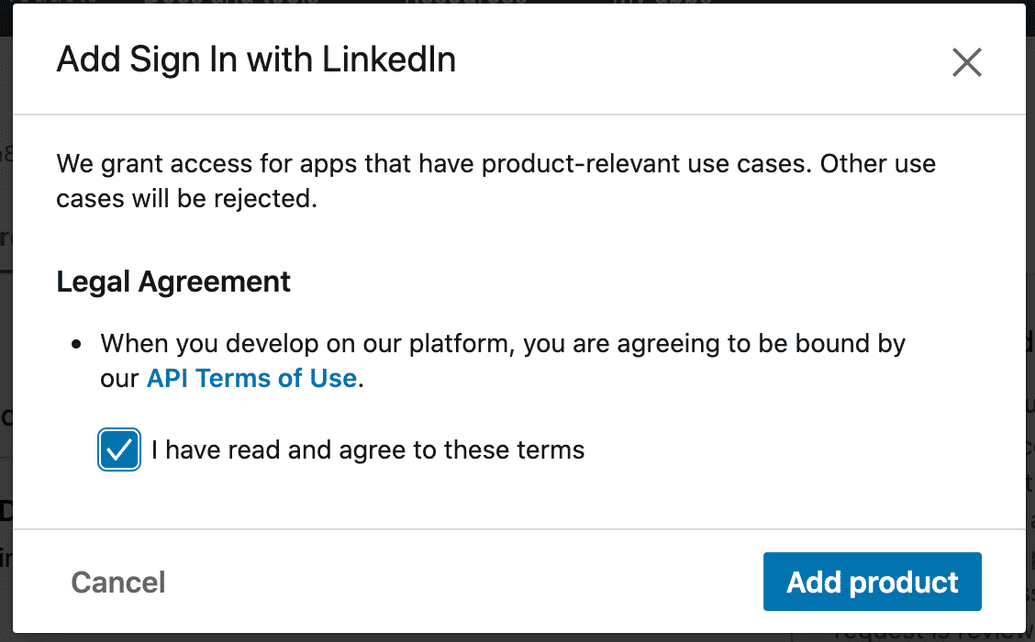
- Read and agree to the legal terms, then click Add Product:
- Your request to add the product will be submitted for review, with the status set to
Review in progress. Wait for some time and refresh the page to see if the product has been approved and added. Usually this is very quick (within a few minutes), but allow up to 24 hours for this to process. If after 24 hours you still have not been approved, please contact LinkedIn support:
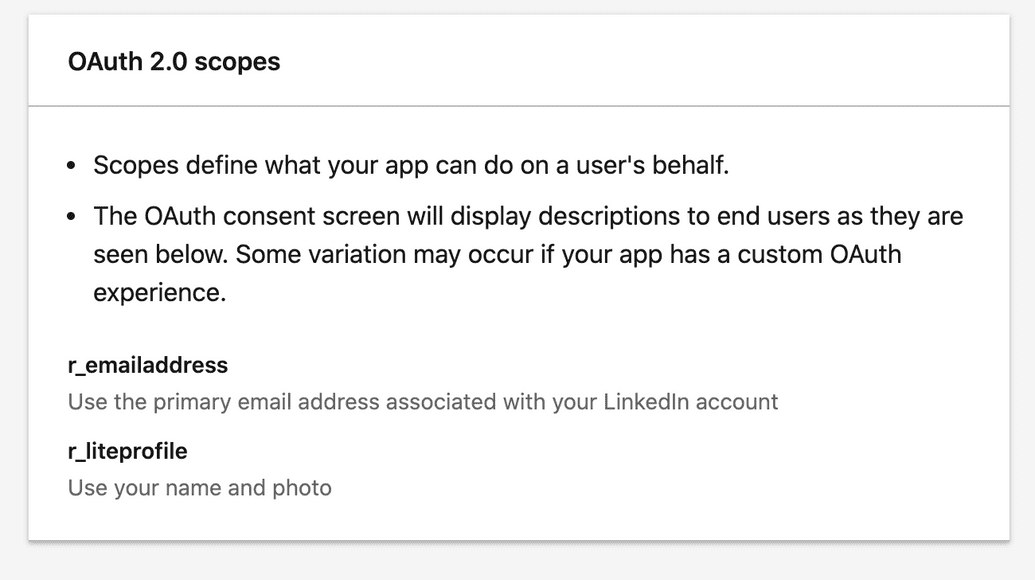
- To verify the Sign in with LinkedIn product was properly added, go to the Settings tab. Under OAuth 2.0 scopes, verify that these scopes have been added:
r_emailaddress,r_liteprofile:
ORCiD
The Overture DMS makes use of the free, public ORCiD API for client applications. Hence, all steps below are described based on the use of the free, public API, and not the paid membership API. For full details on setting up OAUTH 2.0 for an application to with with ORCiD using their free, public API, see here.
However, specifically for the DMS setup, see the summary steps below for acquiring an ORCiD client ID and secret.
- Setup an account with ORCiD, if you don't already have one. If you are an individual working solo with the DMS platform, you may wish to simply use a personal account. However, if you work for a larger organization or institution, they may already have a designated account which you can or should be using. Please consult your IT department if required.
- Log into ORCiD.
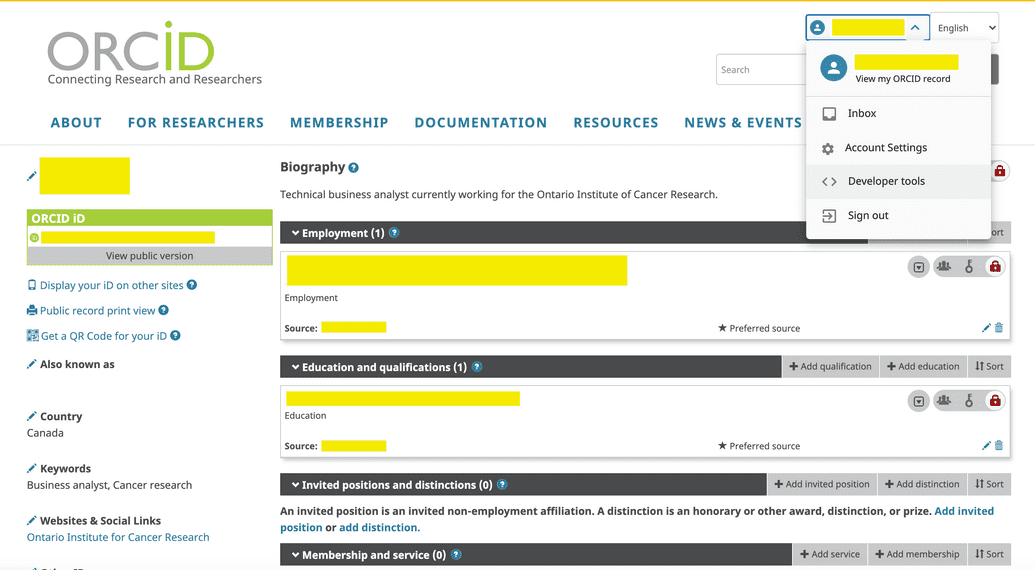
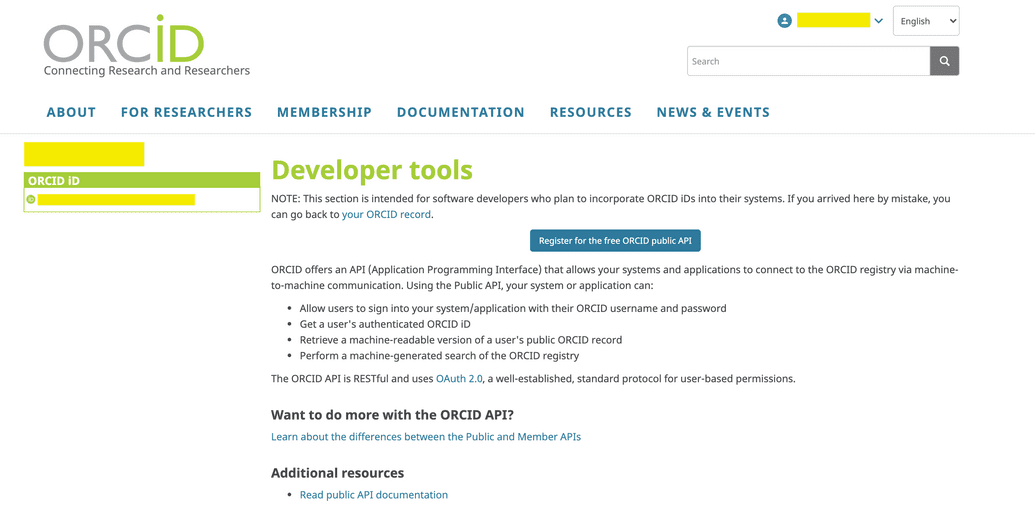
- From your profile icon in the top right, go to Developer Tools:
- Click Register for the free ORCID public API:
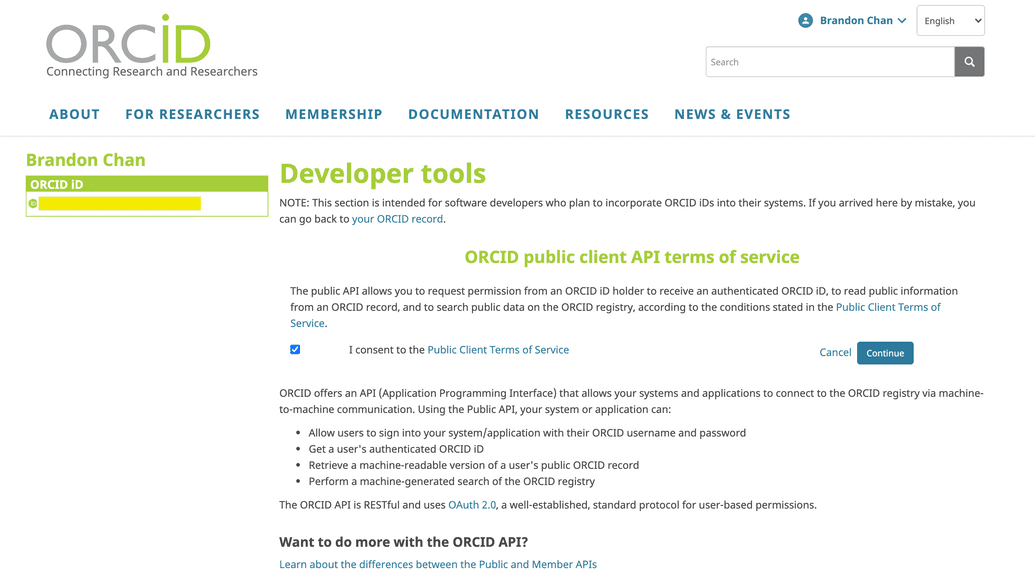
- Read and consent to the Public Client Terms of Service, then click Continue:
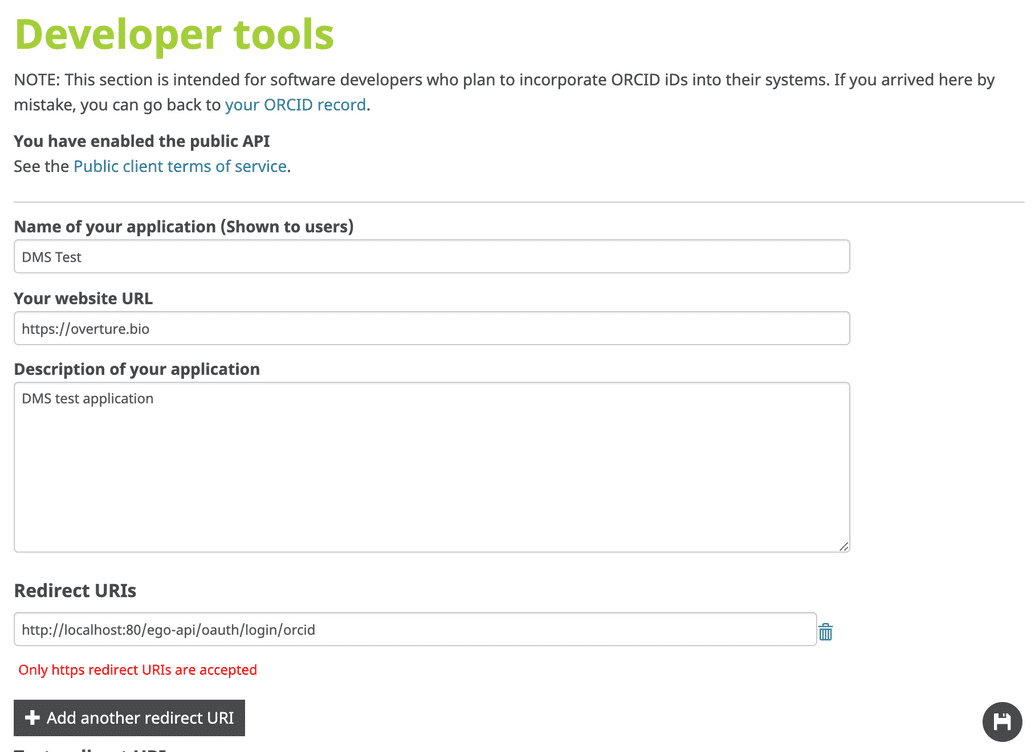
- You can now enter the details for your app. Enter the Name of your application - A descriptive name for your app, e.g. "DMS Test App".
- Enter your website URL. This is the URL to your app's homepage.
NOTE: ORCiD requires a real URL be provided and will actually attempt to ping the site and establish its validity. For server mode deployments, you can simply provide the domain which you will configure for the DMS Gateway. For local mode deployments, you may provide your personal website or your institution's website. However, if you have neither of these, we suggest you simply enter the Overture homepage, https://overture.bio.
| Mode | URI |
|---|---|
| Local | Your personal website, institution's website, or https://overture.bio |
| Server | https://<myDomain>/ego-api |
Where <myDomain> is the registered domain you will configure for the DMS Gateway (e.g. dms.test.cancercollaboratory.org)
- Enter the Description of your application - A short description for your app.
- Under Redirect URIs, enter the URI where ORCiD will redirect users once they have authenticated with the provider (i.e. redirect them back to Ego once logged in successfully):
| Mode | URI |
|---|---|
| Local | http://localhost:<port>/ego-api/oauth/login/orcid |
| Server | https://<myDomain>/ego-api/oauth/login/orcid |
Where:
<port>is the port on which you will deploy the DMS Gateway in local mode<myDomain>is the registered domain you will configure for the DMS Gateway (e.g.dms.test.cancercollaboratory.org)
NOTE: ORCiD may give a warning that "Only https redirect URIs are accepted". However, this is a warning only and you may still enter an HTTP URI as indicated above. The application will still save and the Client ID and Secret will still be generated.
- Click the Save icon in the bottom right:
- After saving the app, the Client ID and Client Secret will be displayed to you so you can copy them for use later. Keep these safe and secure. You can always access & view these values in by going to the ORCiD Developer Tools and viewing your app:
- You can now supply the Client ID and Client Secret to the DMS Installer in the Ego configuration section as required.

